
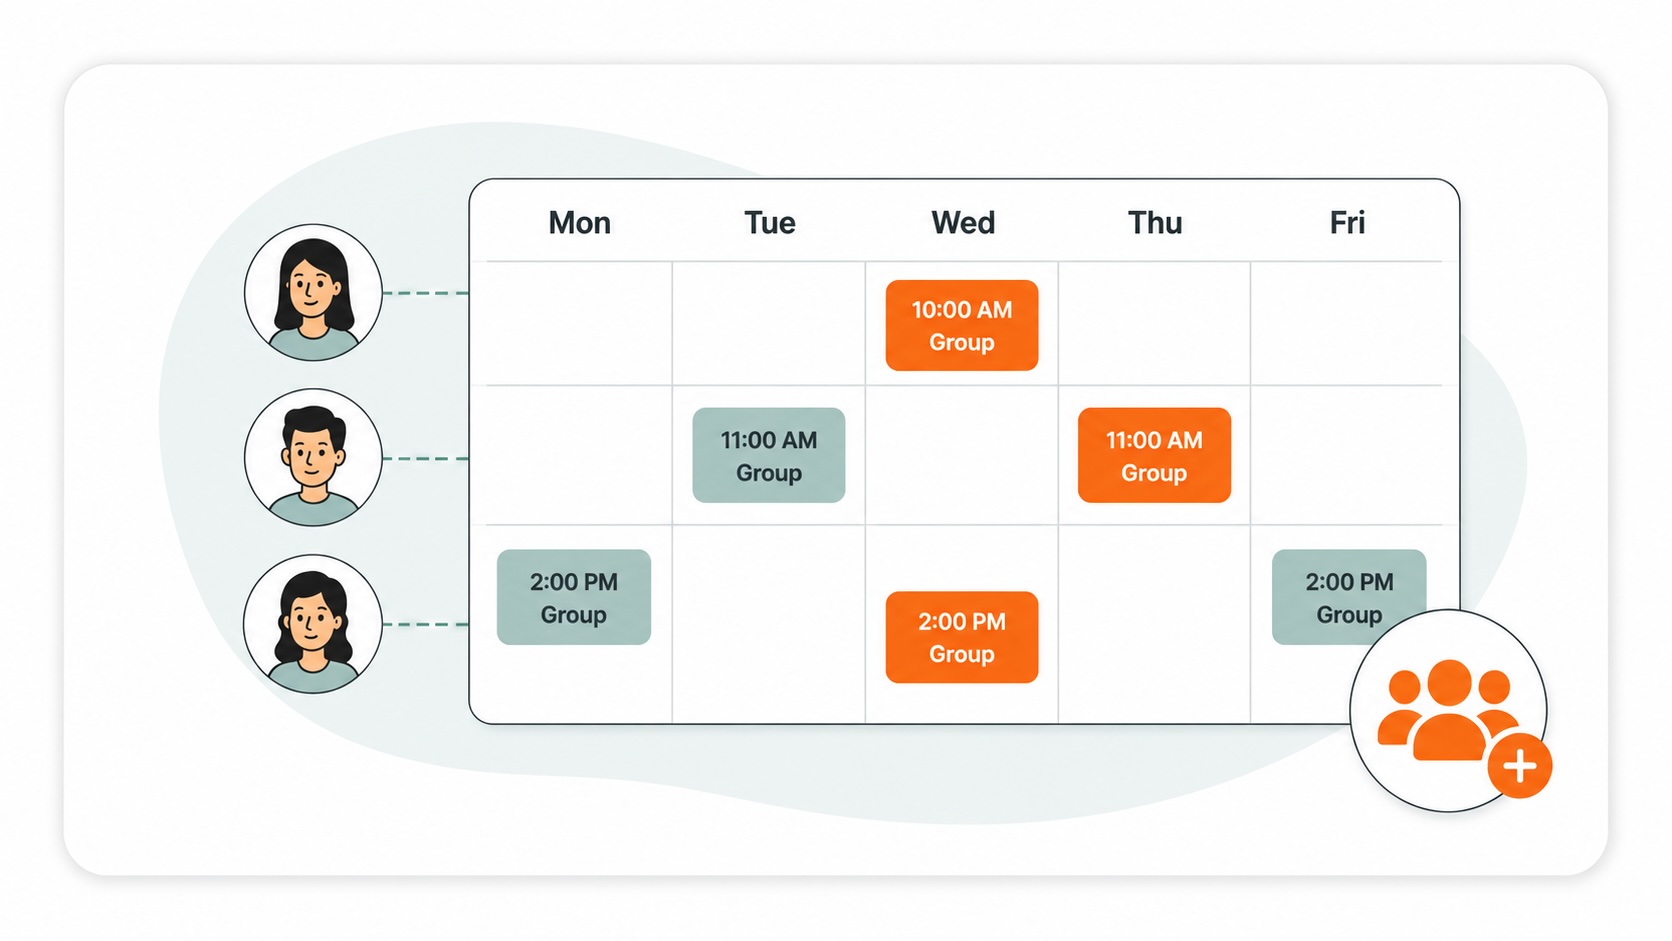
Scheduling multiple students at the same time

Scheduling multiple students at the same time

lessonsschedulingstudents
How to schedule fixed lessons using the scheduler
How to schedule rotating lessons using the scheduler

Step 1 — Click on "Scheduler" link in the Sidebar
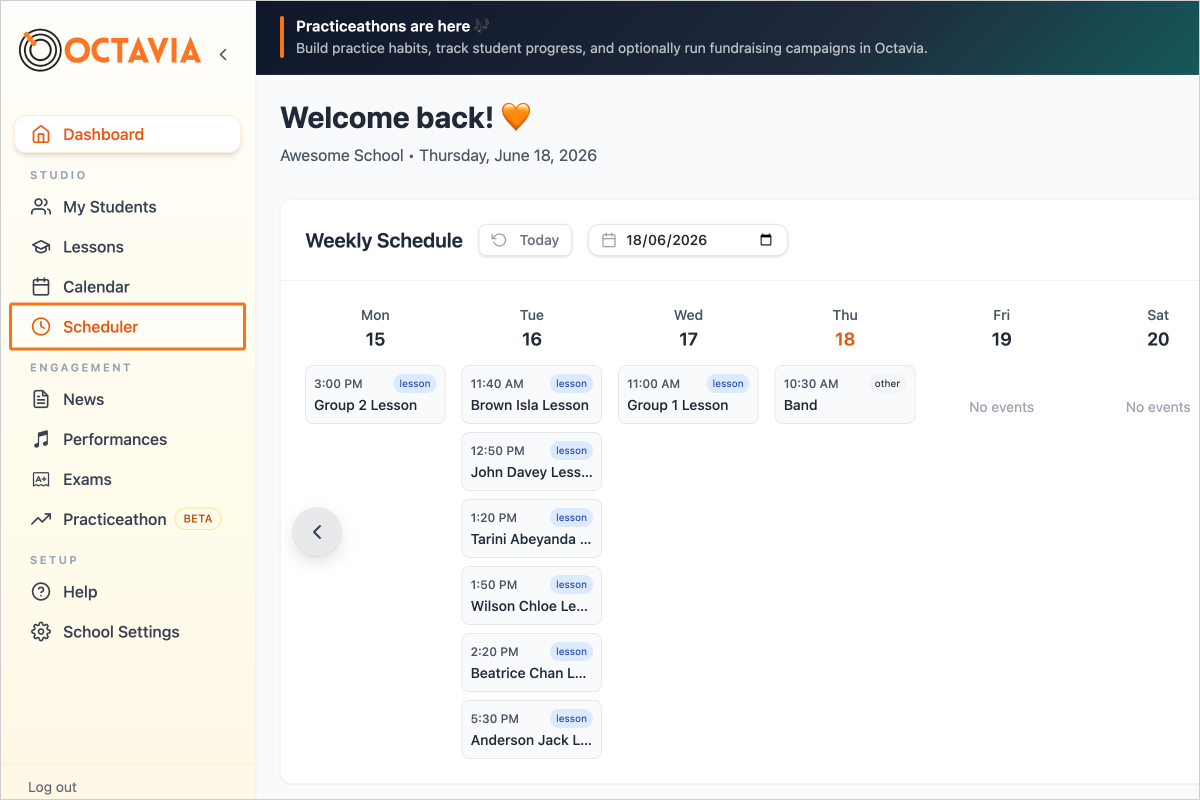
Step 1 - Click on "Scheduler" link in the Sidebar

Step 2 — If any of your students don't yet have a lesson type, click on the pencil icon next to the lesson type badge
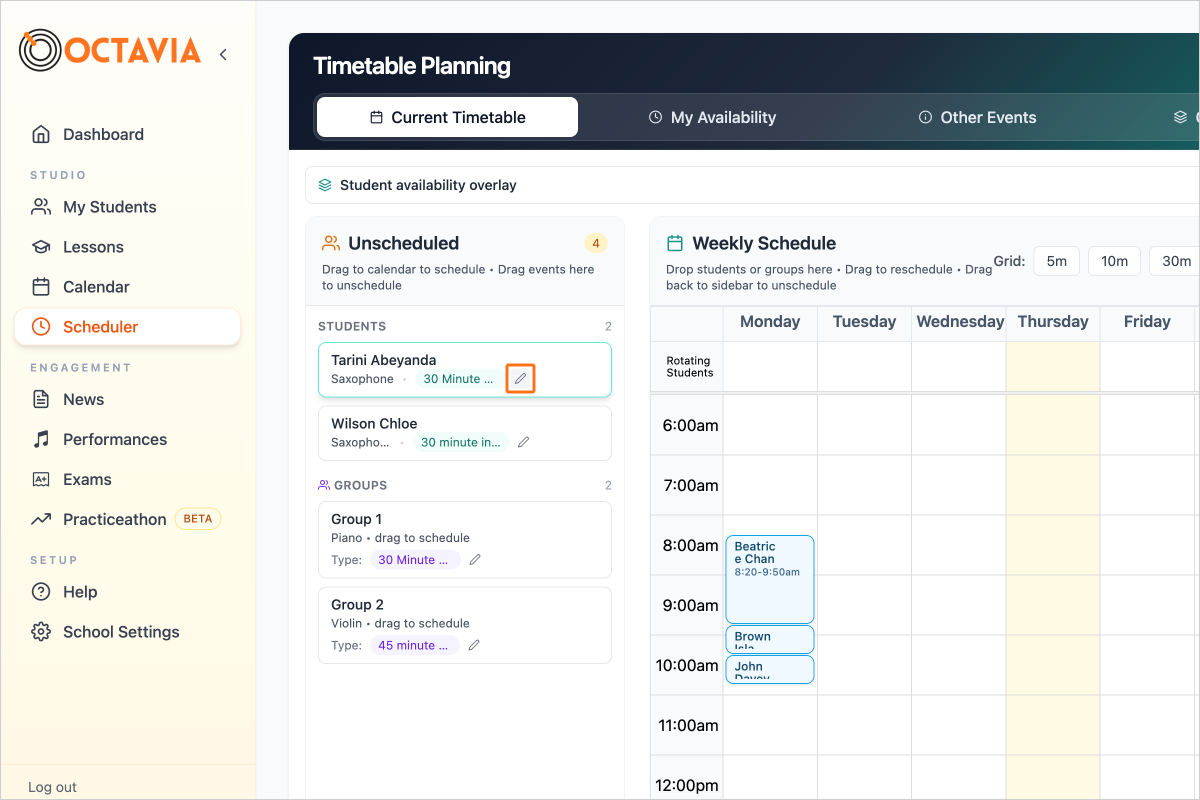
Step 2 - If any of your students don't yet have a lesson type, click on the pencil icon next to the lesson type badge

Step 3 — Select the correct lesson type
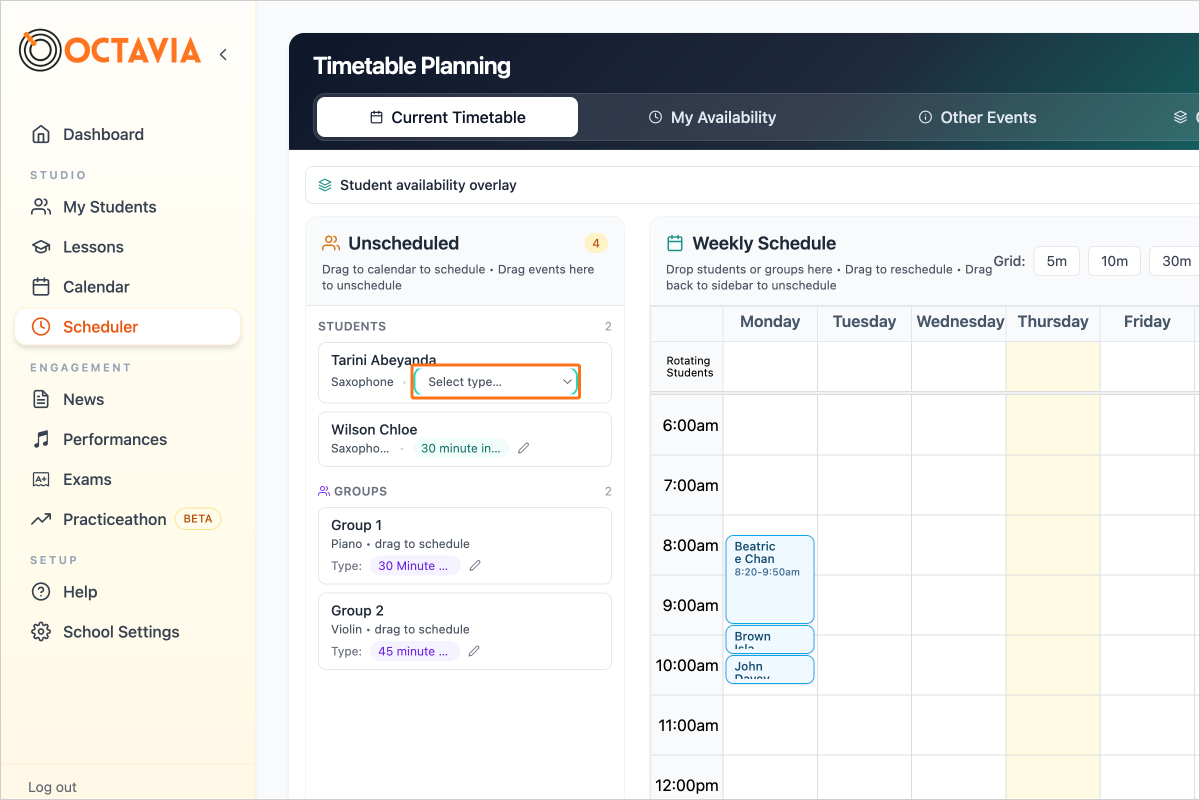
Step 3 - Select the correct lesson type

Step 4 — Click and drag on the student cards in the Unscheduled list, and drag them to a spot on the timetable - either a fixed spot, or to the rotating row if their lesson time should rotate each week.
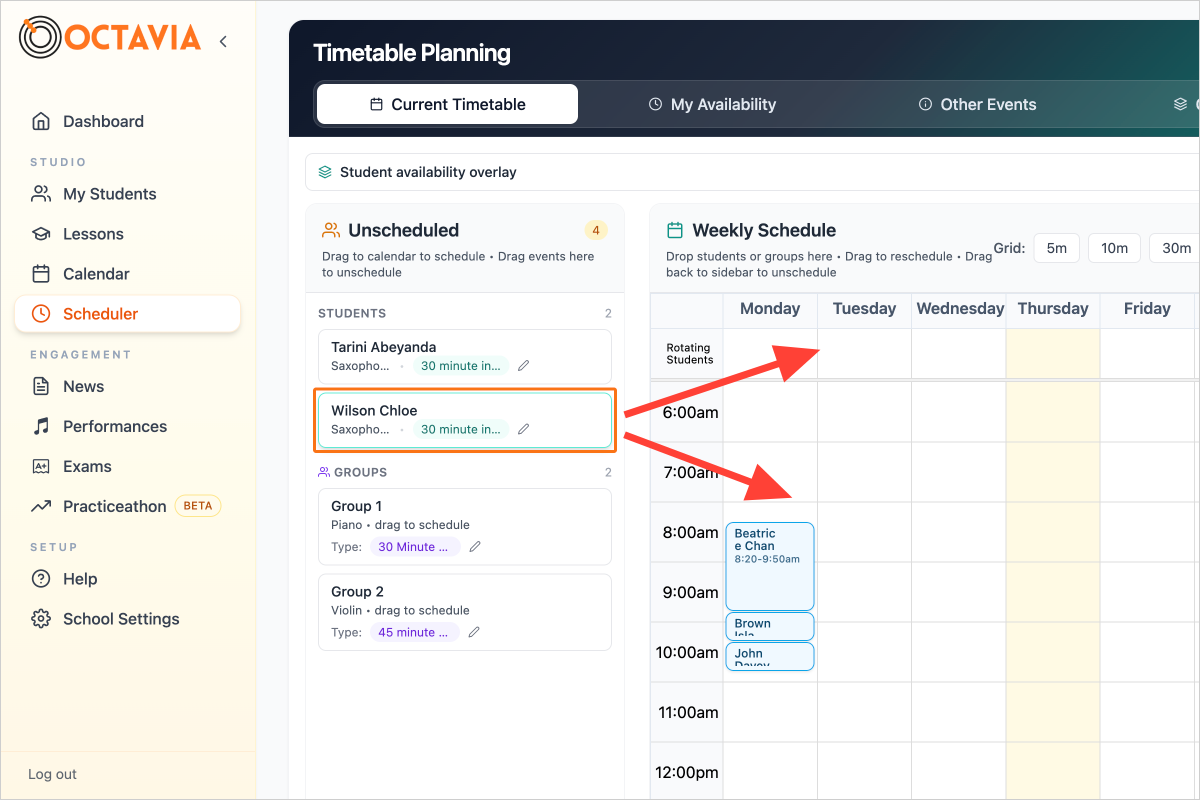
Step 4 - Click and drag on the student cards in the Unscheduled list, and drag them to a spot on the timetable - either a fixed spot, or to the rotating row if their lesson time should rotate each week.

Step 5 — Select a date range to generate the lessons for, or use the 4, 8, 12 or 16 week buttons to quickly calculate a date range
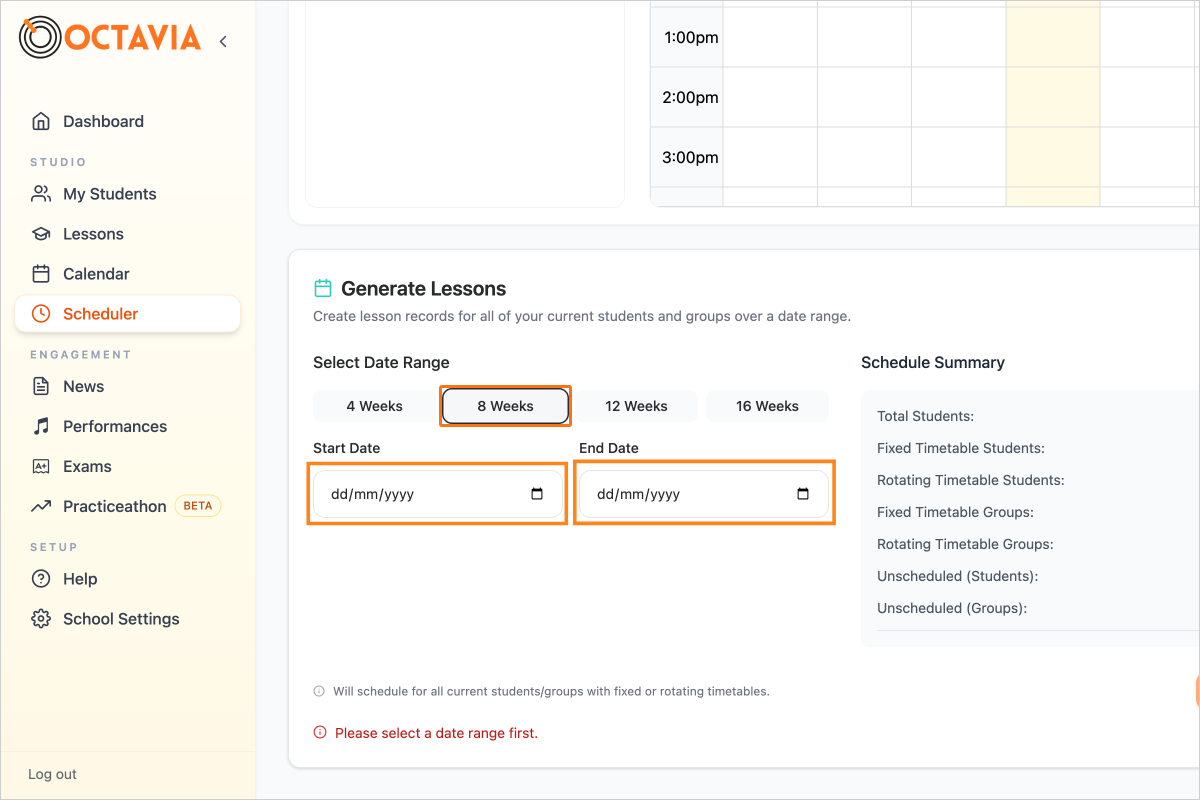
Step 5 - Select a date range to generate the lessons for, or use the 4, 8, 12 or 16 week buttons to quickly calculate a date range

Step 6 — Click on the button "Schedule Lessons"
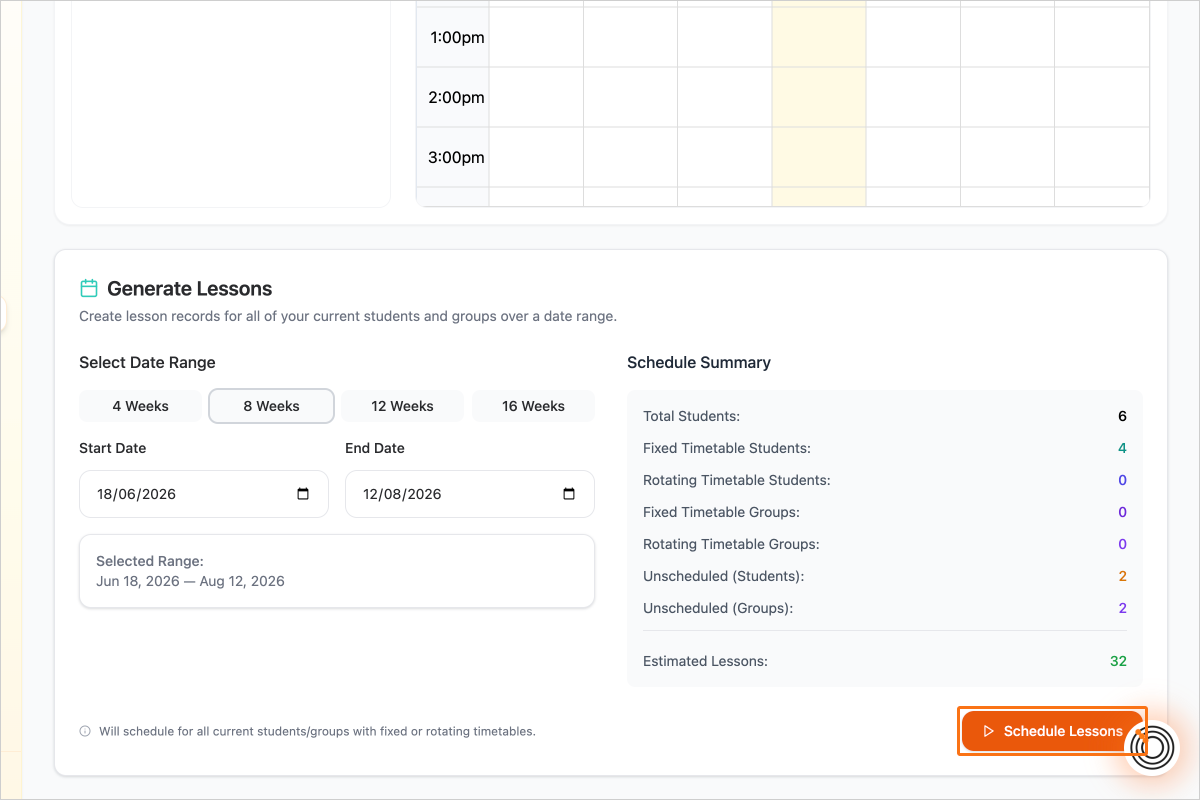
Step 6 - Click on the button "Schedule Lessons"

Step 7 — Review the preview and, when happy, click on the button "Generate Lessons"
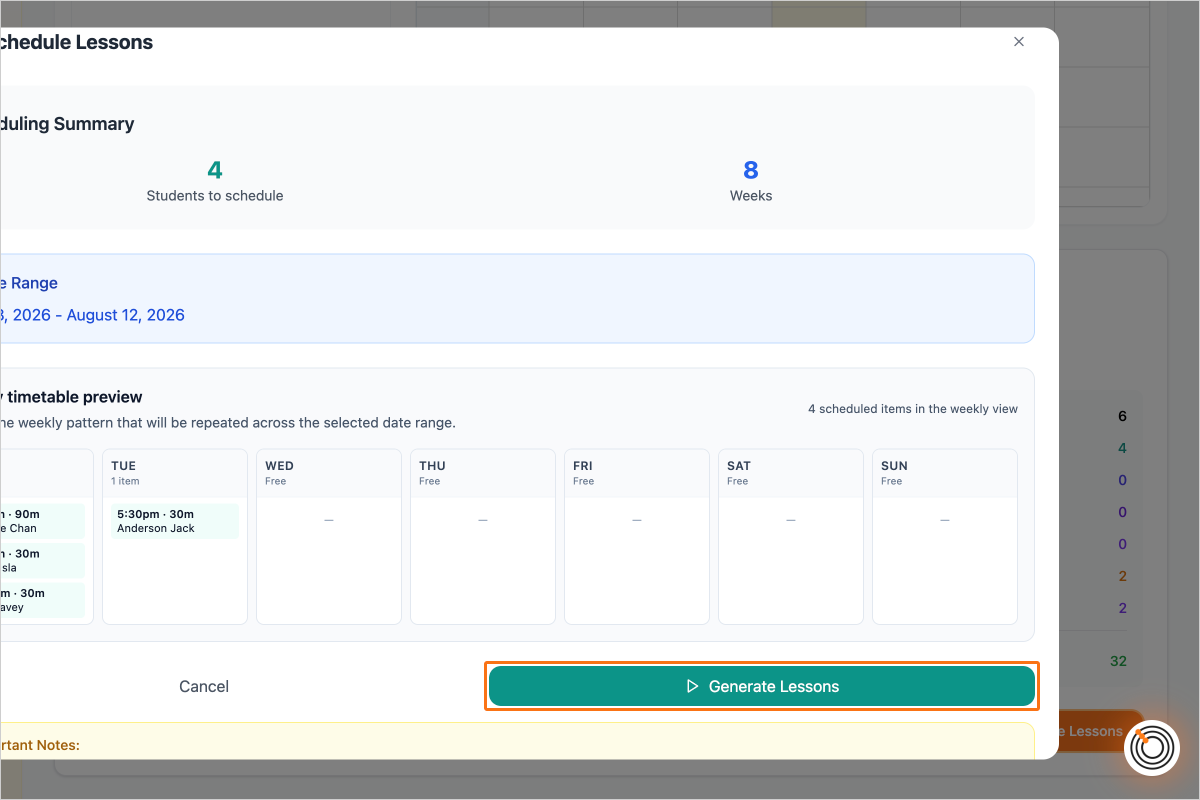
Step 7 - Review the preview and, when happy, click on the button "Generate Lessons"

Step 8 — If there are existing lessons in that date range for that student, you will be asked to either keep the existing lessons, or delete and replace them with newly scheduled ones.
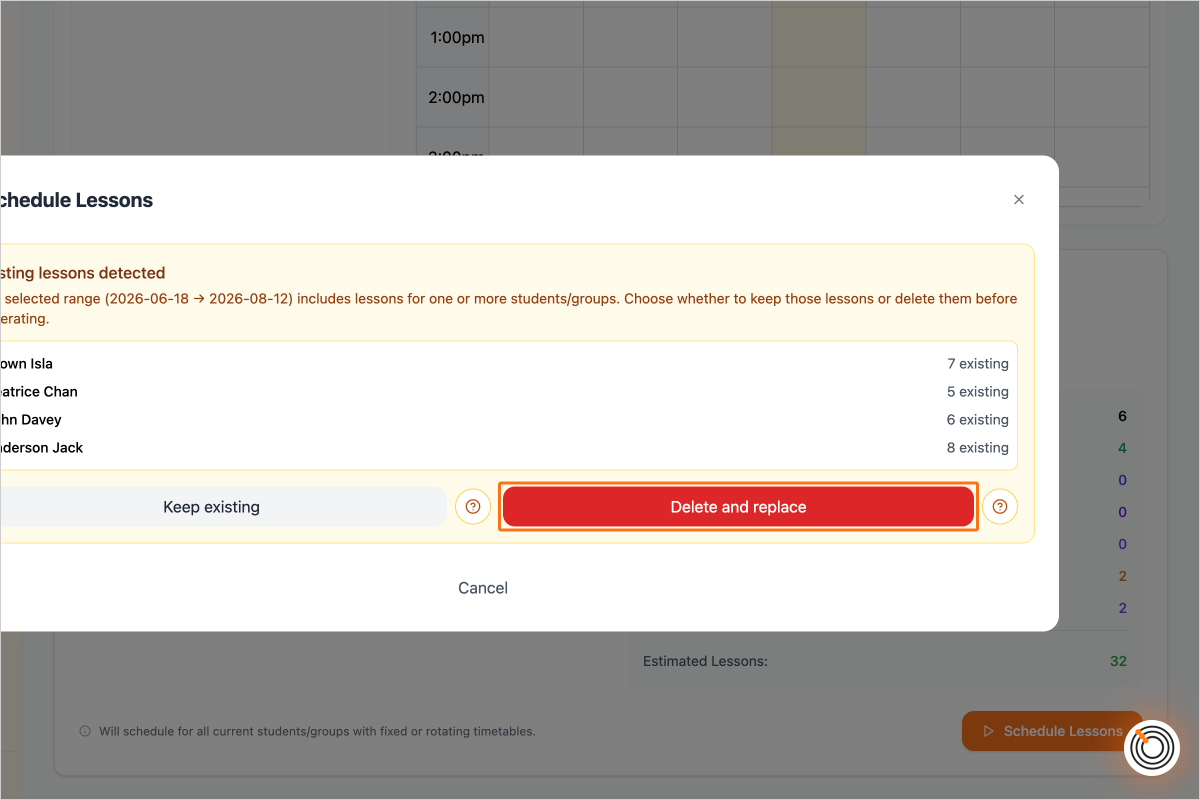
Step 8 - If there are existing lessons in that date range for that student, you will be asked to either keep the existing lessons, or delete and replace them with newly scheduled ones.

Step 9 — Once the lessons are created, you can "View in Calendar" or "View in Lessons List" or simply click "Done".
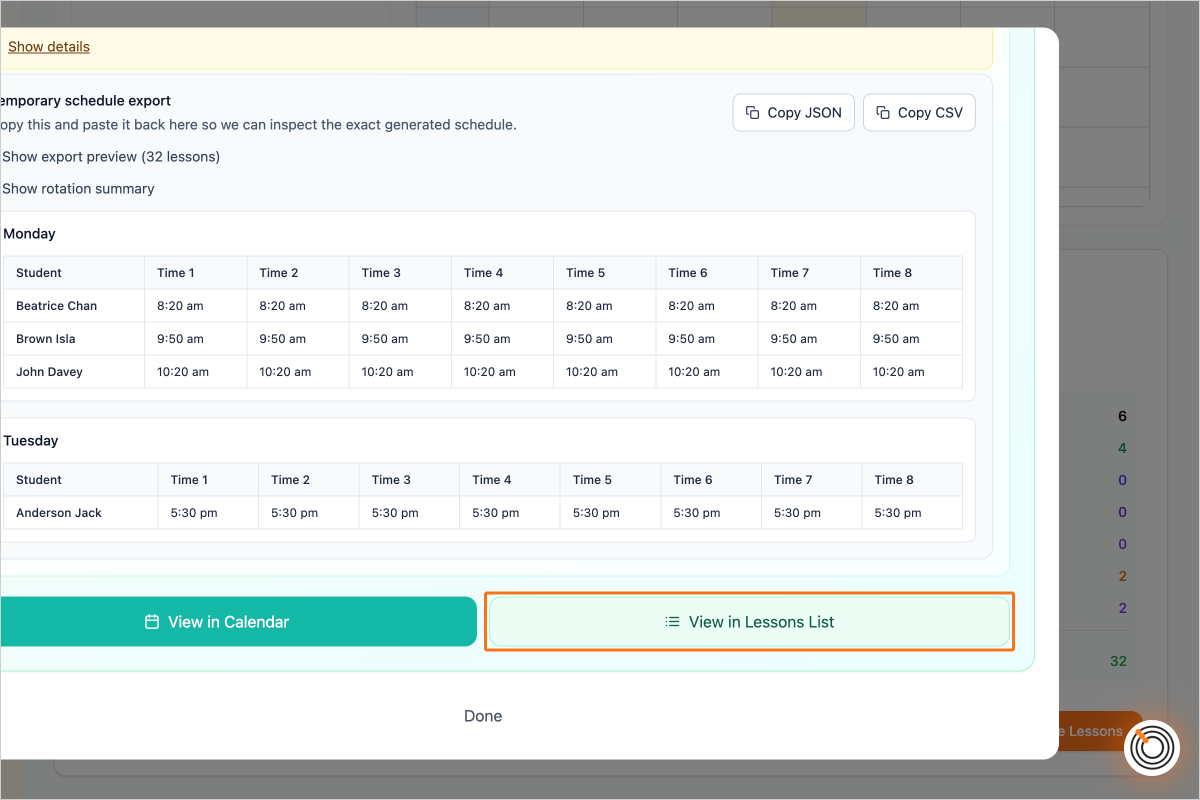
Step 9 - Once the lessons are created, you can "View in Calendar" or "View in Lessons List" or simply click "Done".

Step 10 — You can make changes to the lessons that were generated in either the Lessons List or the Calendar
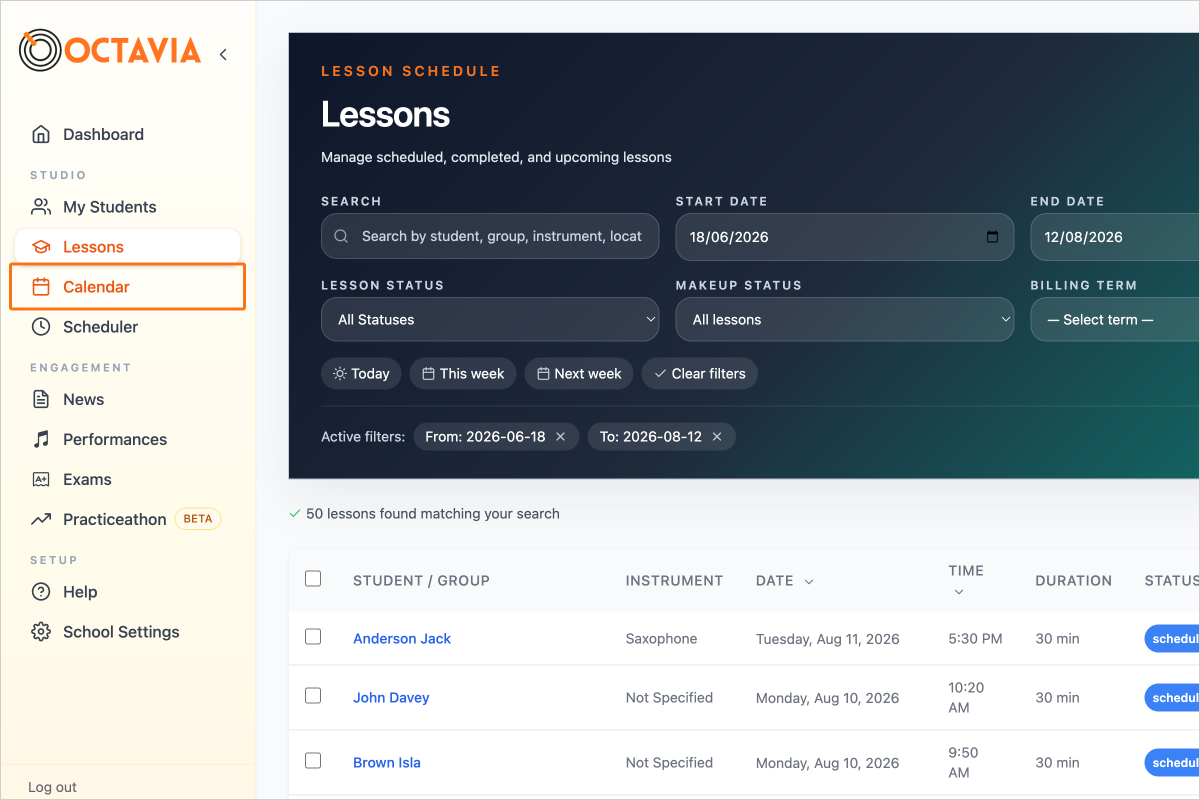
Step 10 - You can make changes to the lessons that were generated in either the Lessons List or the Calendar

Step 11 — To edit a lesson, you can click and drag it. Or you can click on it...
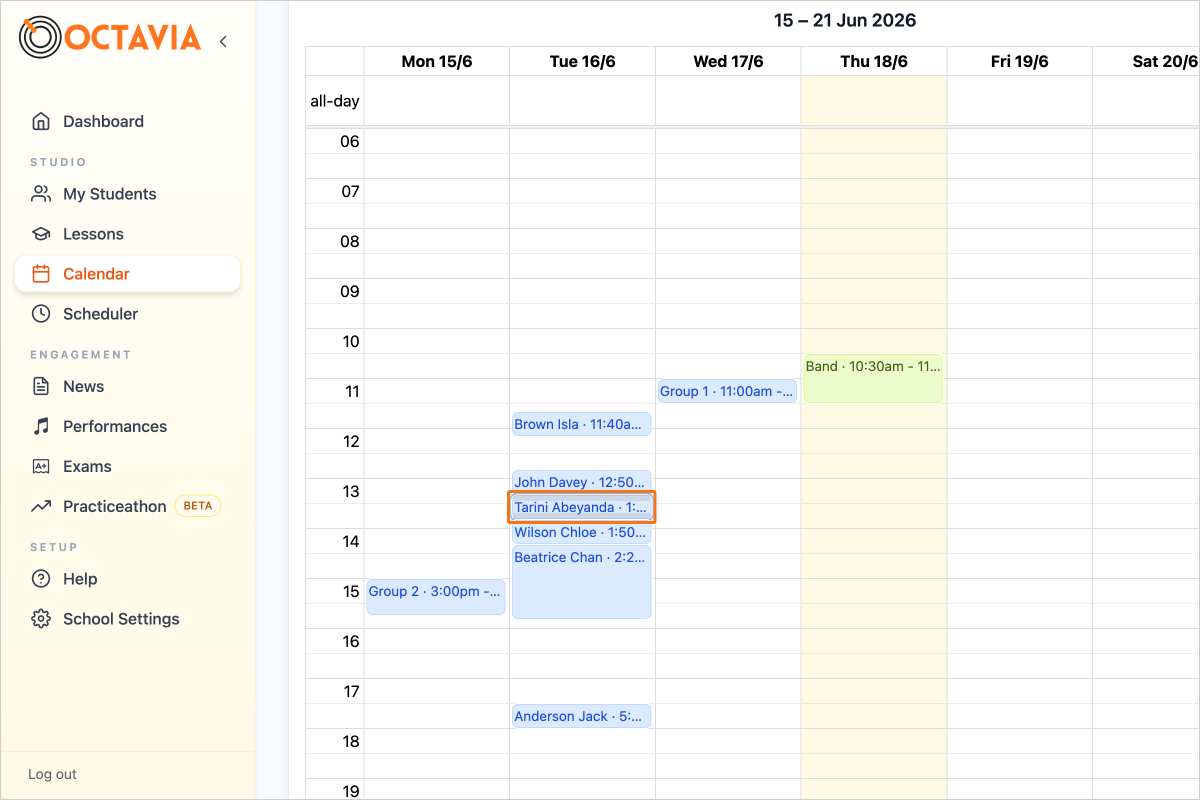
Step 11 - To edit a lesson, you can click and drag it. Or you can click on it...

Step 12 — and click on the pencil icon to edit the lesson date and time
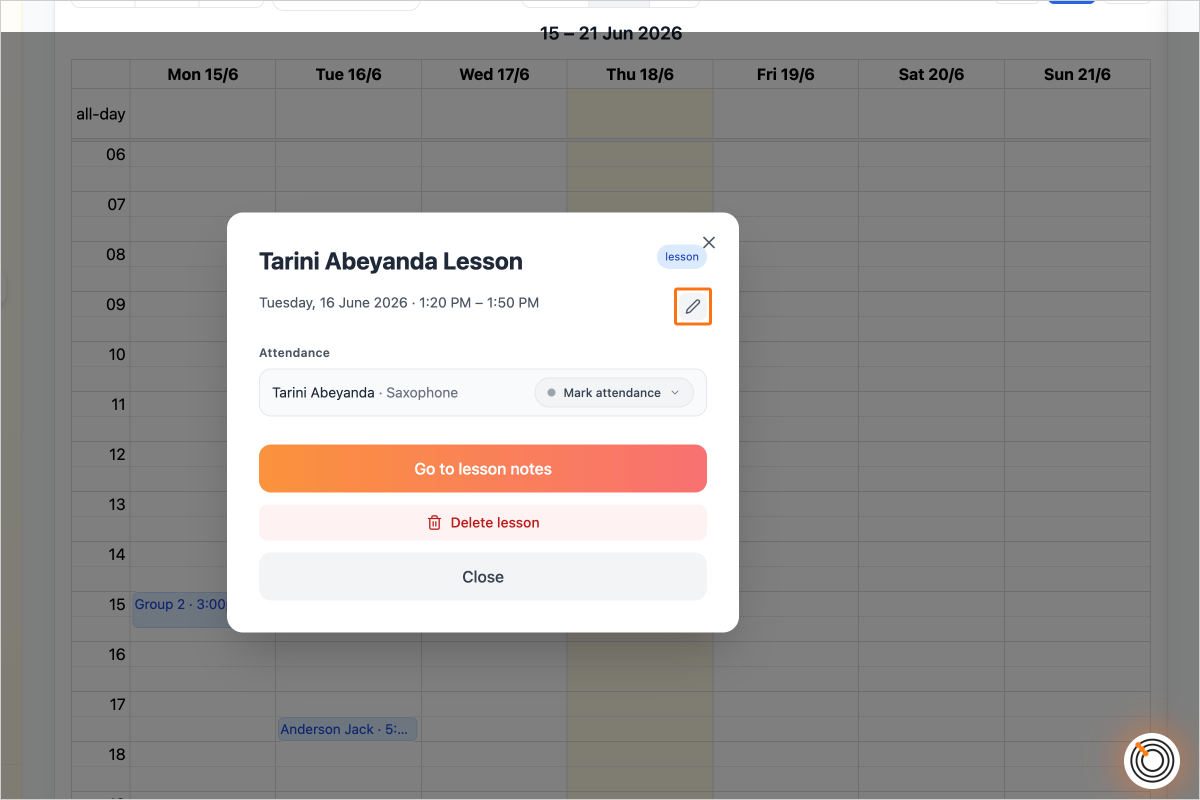
Step 12 - and click on the pencil icon to edit the lesson date and time

Step 13 — Enter the adjusted details and click "Save"
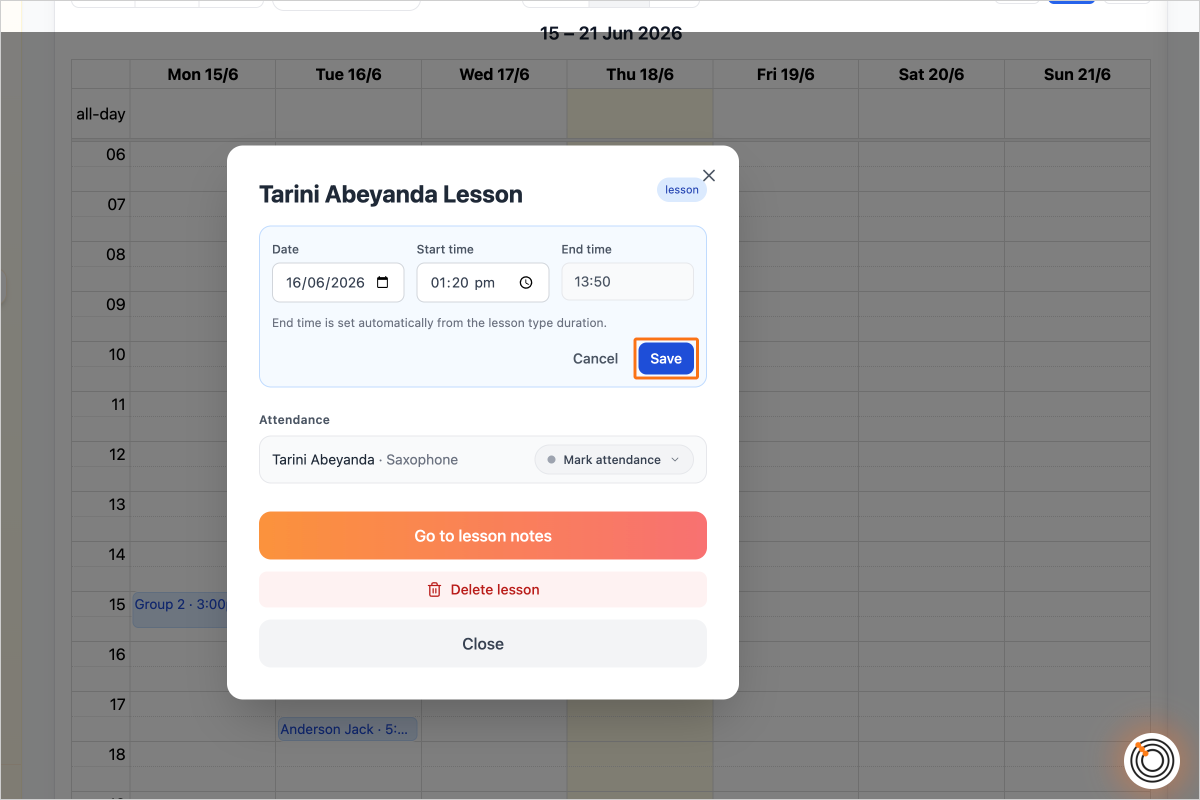
Step 13 - Enter the adjusted details and click "Save"

Create your account

You’ll have access to the complete Pro Teacher features for 30 days, and after that you’ll still be able to access all the free features to run your studio.