
Your whole teaching week, planned in one view
Stop building your schedule one lesson at a time.
Octavia's Timetable Planner gives you a visual, drag-and-drop canvas to place every student and group into your week — and see how it all fits together before a single lesson is generated.
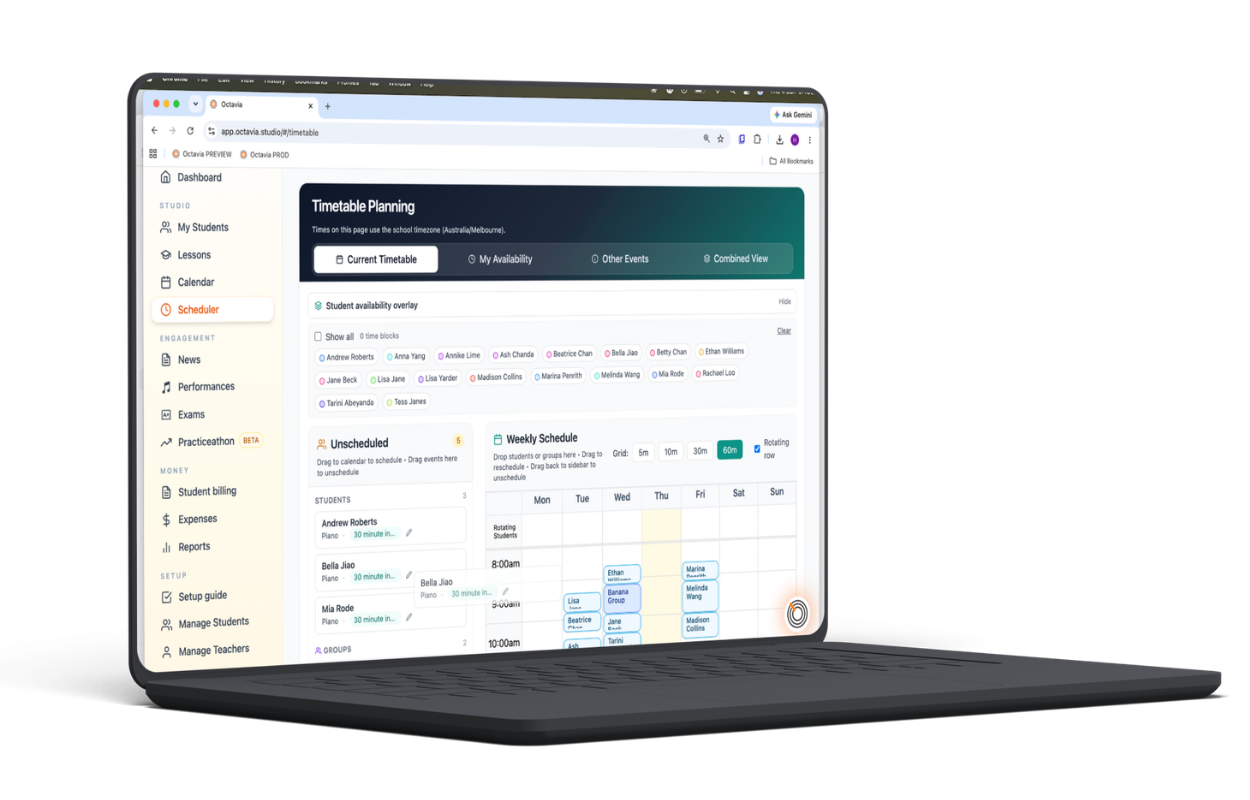
Place students. Move them. See the whole picture. Then generate.
The Timetable Planner gives you a single, visual workspace for your entire teaching week. Drag students from the sidebar into time slots. Move them if something doesn't fit. Pull them back out and try again. Nothing is committed until you're ready.
When the plan looks right, you apply it — and Octavia generates the lessons.
Everyone who needs a slot — right in front of you
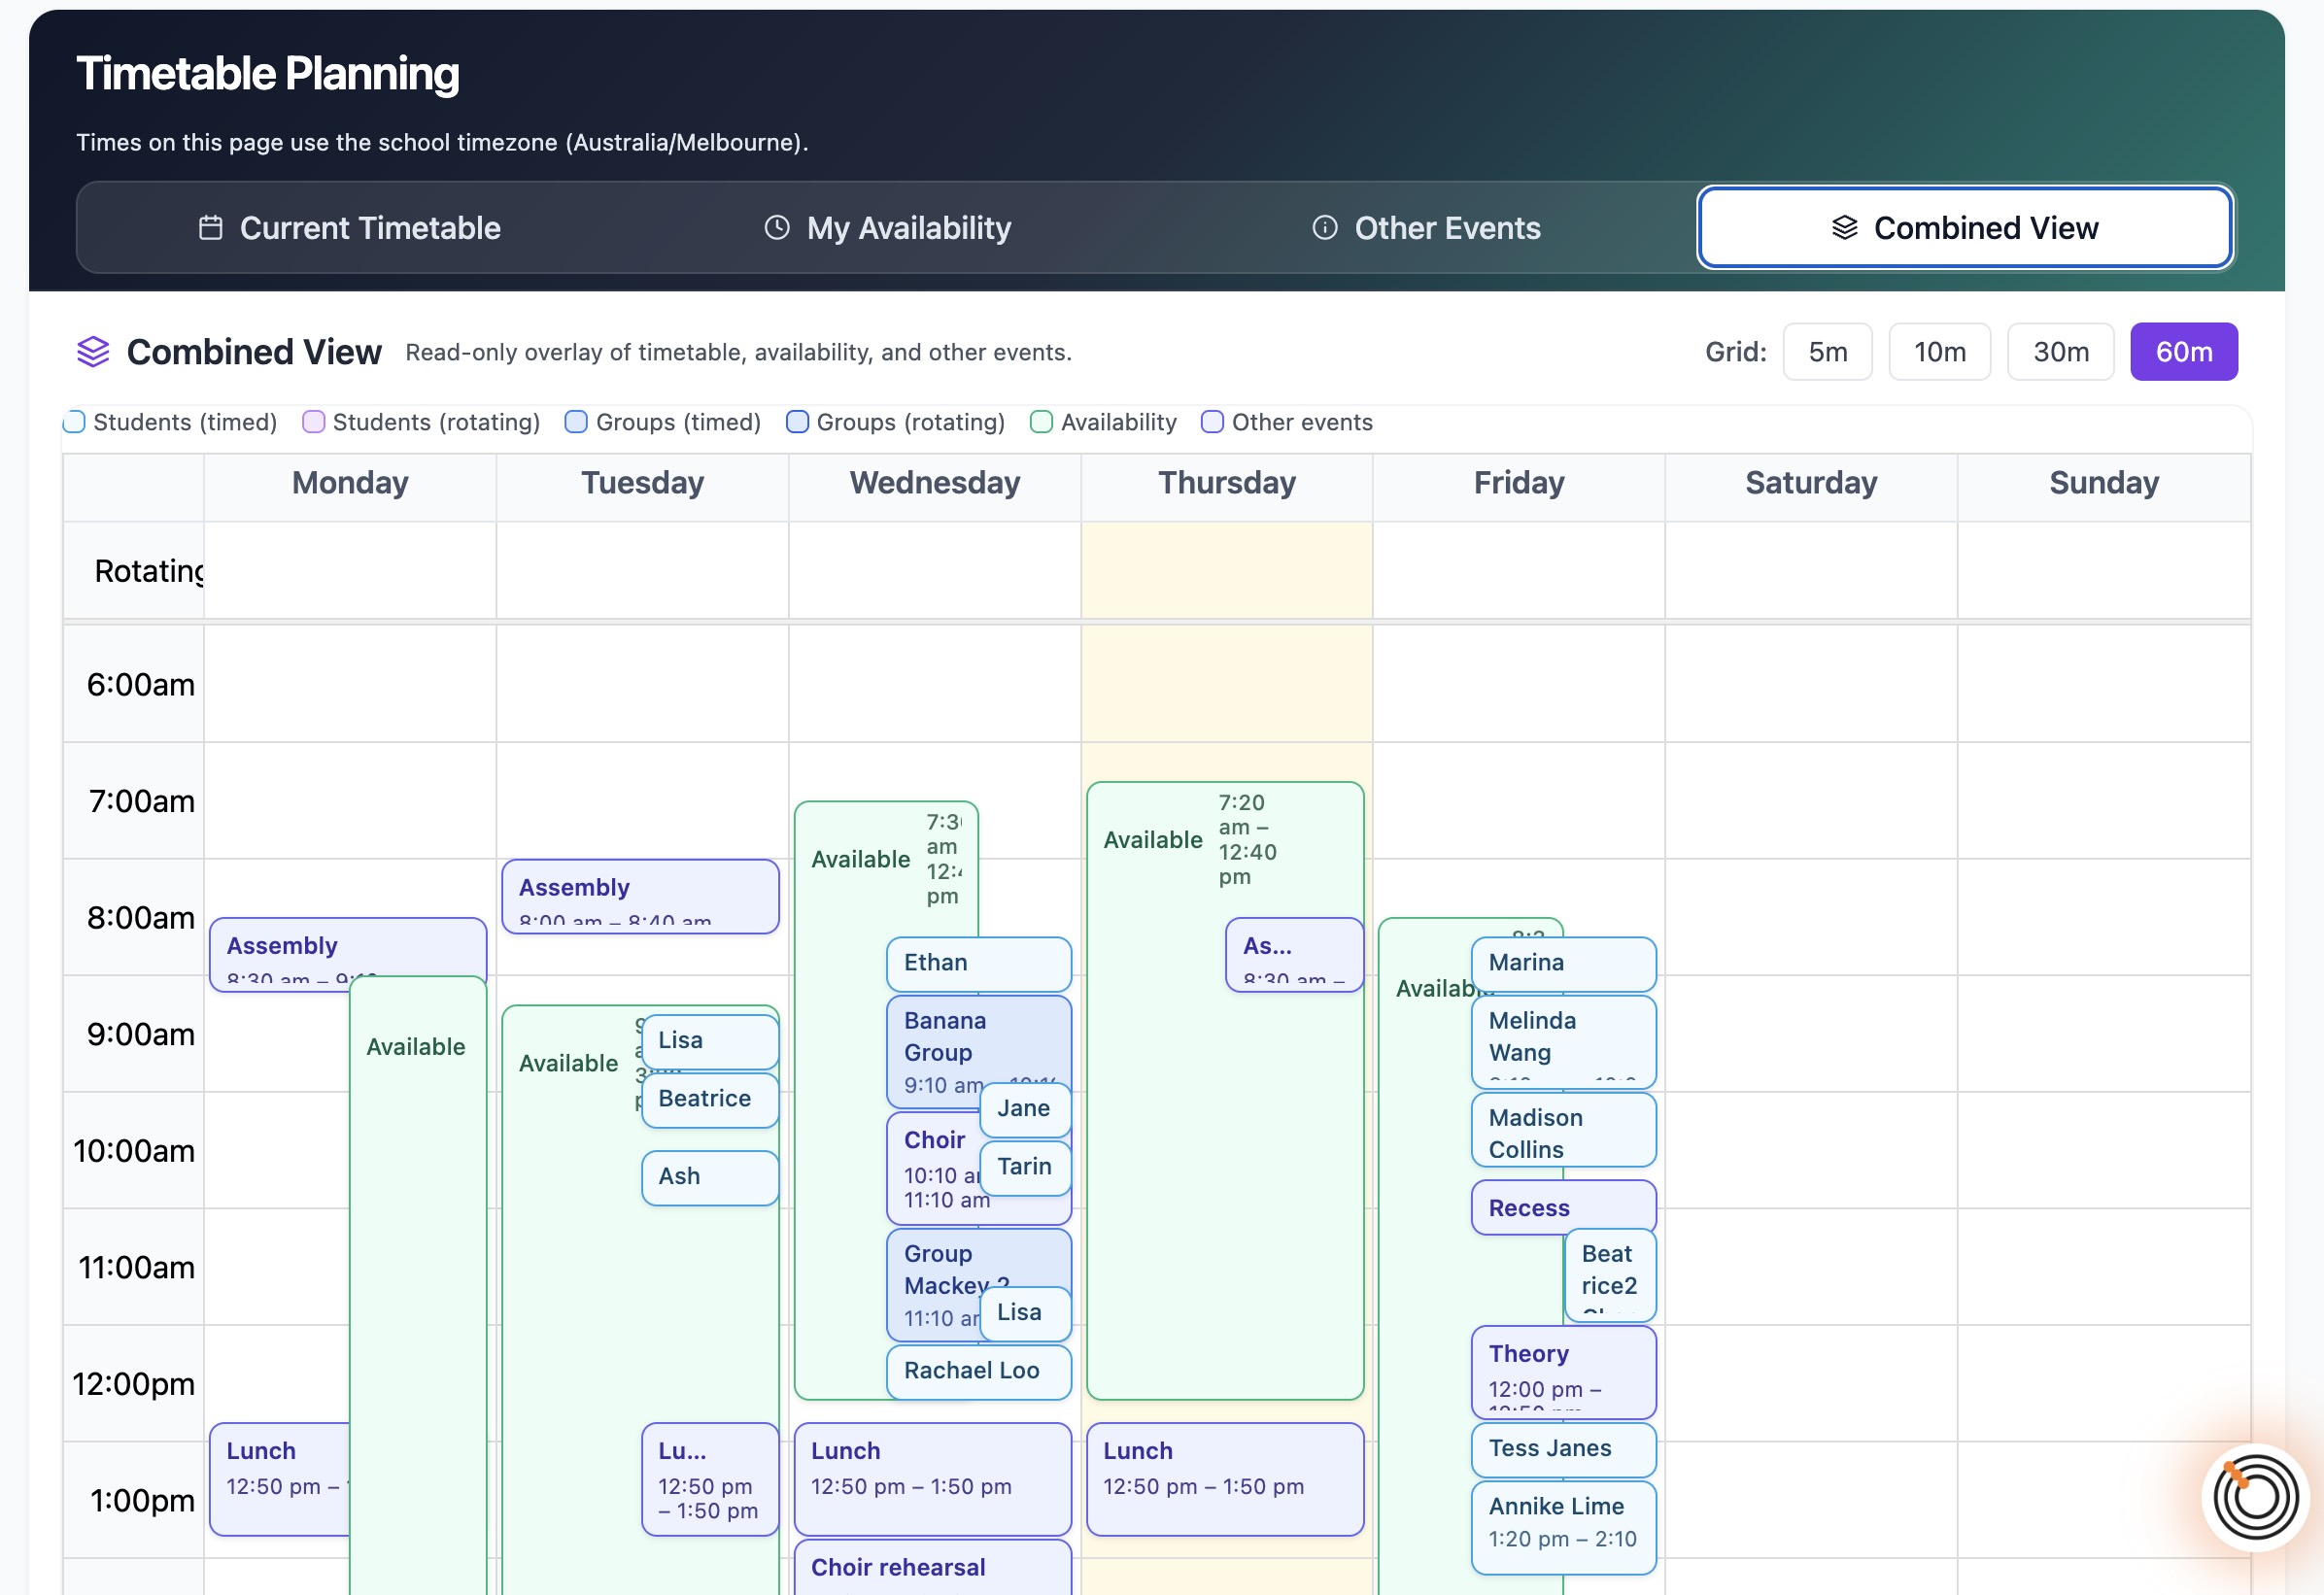
The left sidebar shows every student who hasn't yet been placed into the timetable. Individual students sit in the Unscheduled section. Groups appear in their own section below.
Nothing gets forgotten. As you drag people into the grid, the sidebar updates in real time. When it's empty, your week is fully planned.
If you need to undo a placement, drag the student back to the sidebar and they're removed from the grid instantly.
A grid that fits the way you teach
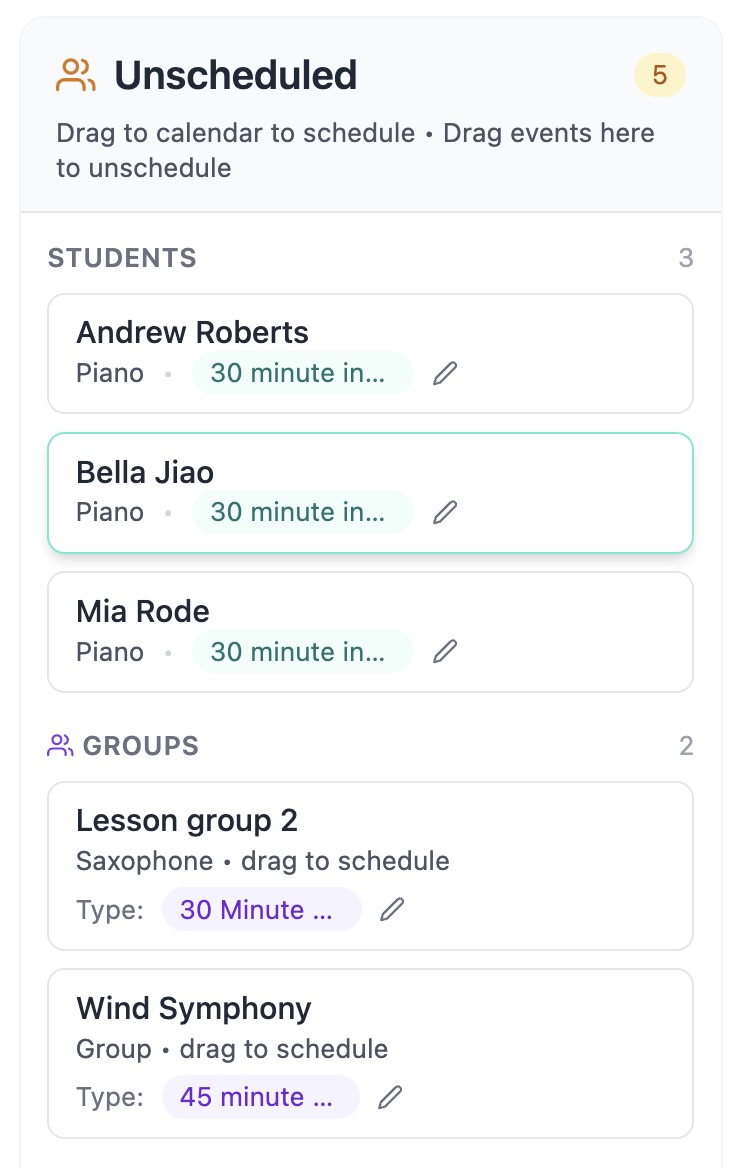
Not every studio runs on the same rhythm. Some teachers pack in half-hour lessons back to back. Others run 45-minute slots with transition gaps. Some need fine-grained 5 or 10-minute resolution to place short lessons precisely.
The weekly grid is fully configurable. Switch between 5, 10, 30, or 60-minute slot increments using the toolbar, and the entire grid redraws to match. Your placed students stay where they are.
The grid spans your full teaching week so you can plan Monday to Sunday in a single view.
Know when your students are free — before you place them
Placing a student into a slot they can't make is the single most frustrating scheduling mistake. The student availability overlay eliminates it.
Toggle the overlay on and the grid highlights exactly when each student is available. You can see at a glance which slots will work and which won't — before you drag anyone anywhere.
It's the prerequisite information that turns guesswork into a confident plan.
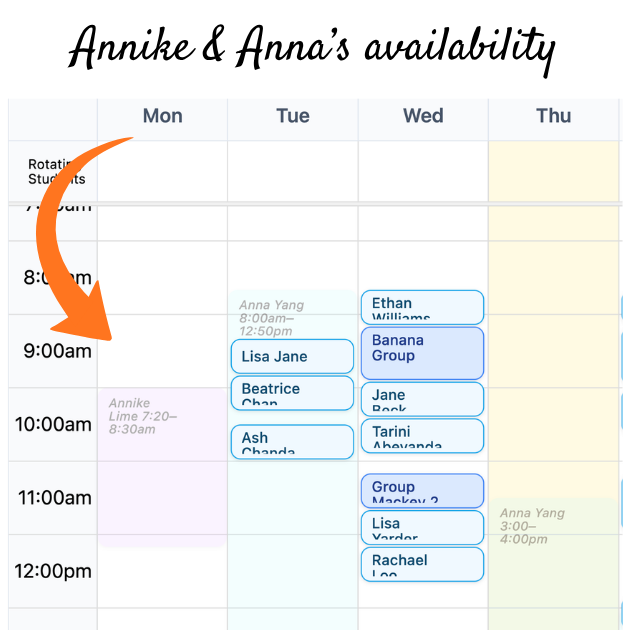
See how easy it is to get everyone's availability in one place — then use it for your scheduling.
A full planning environment, not just a grid
Switch between four dedicated views depending on what you're working on.
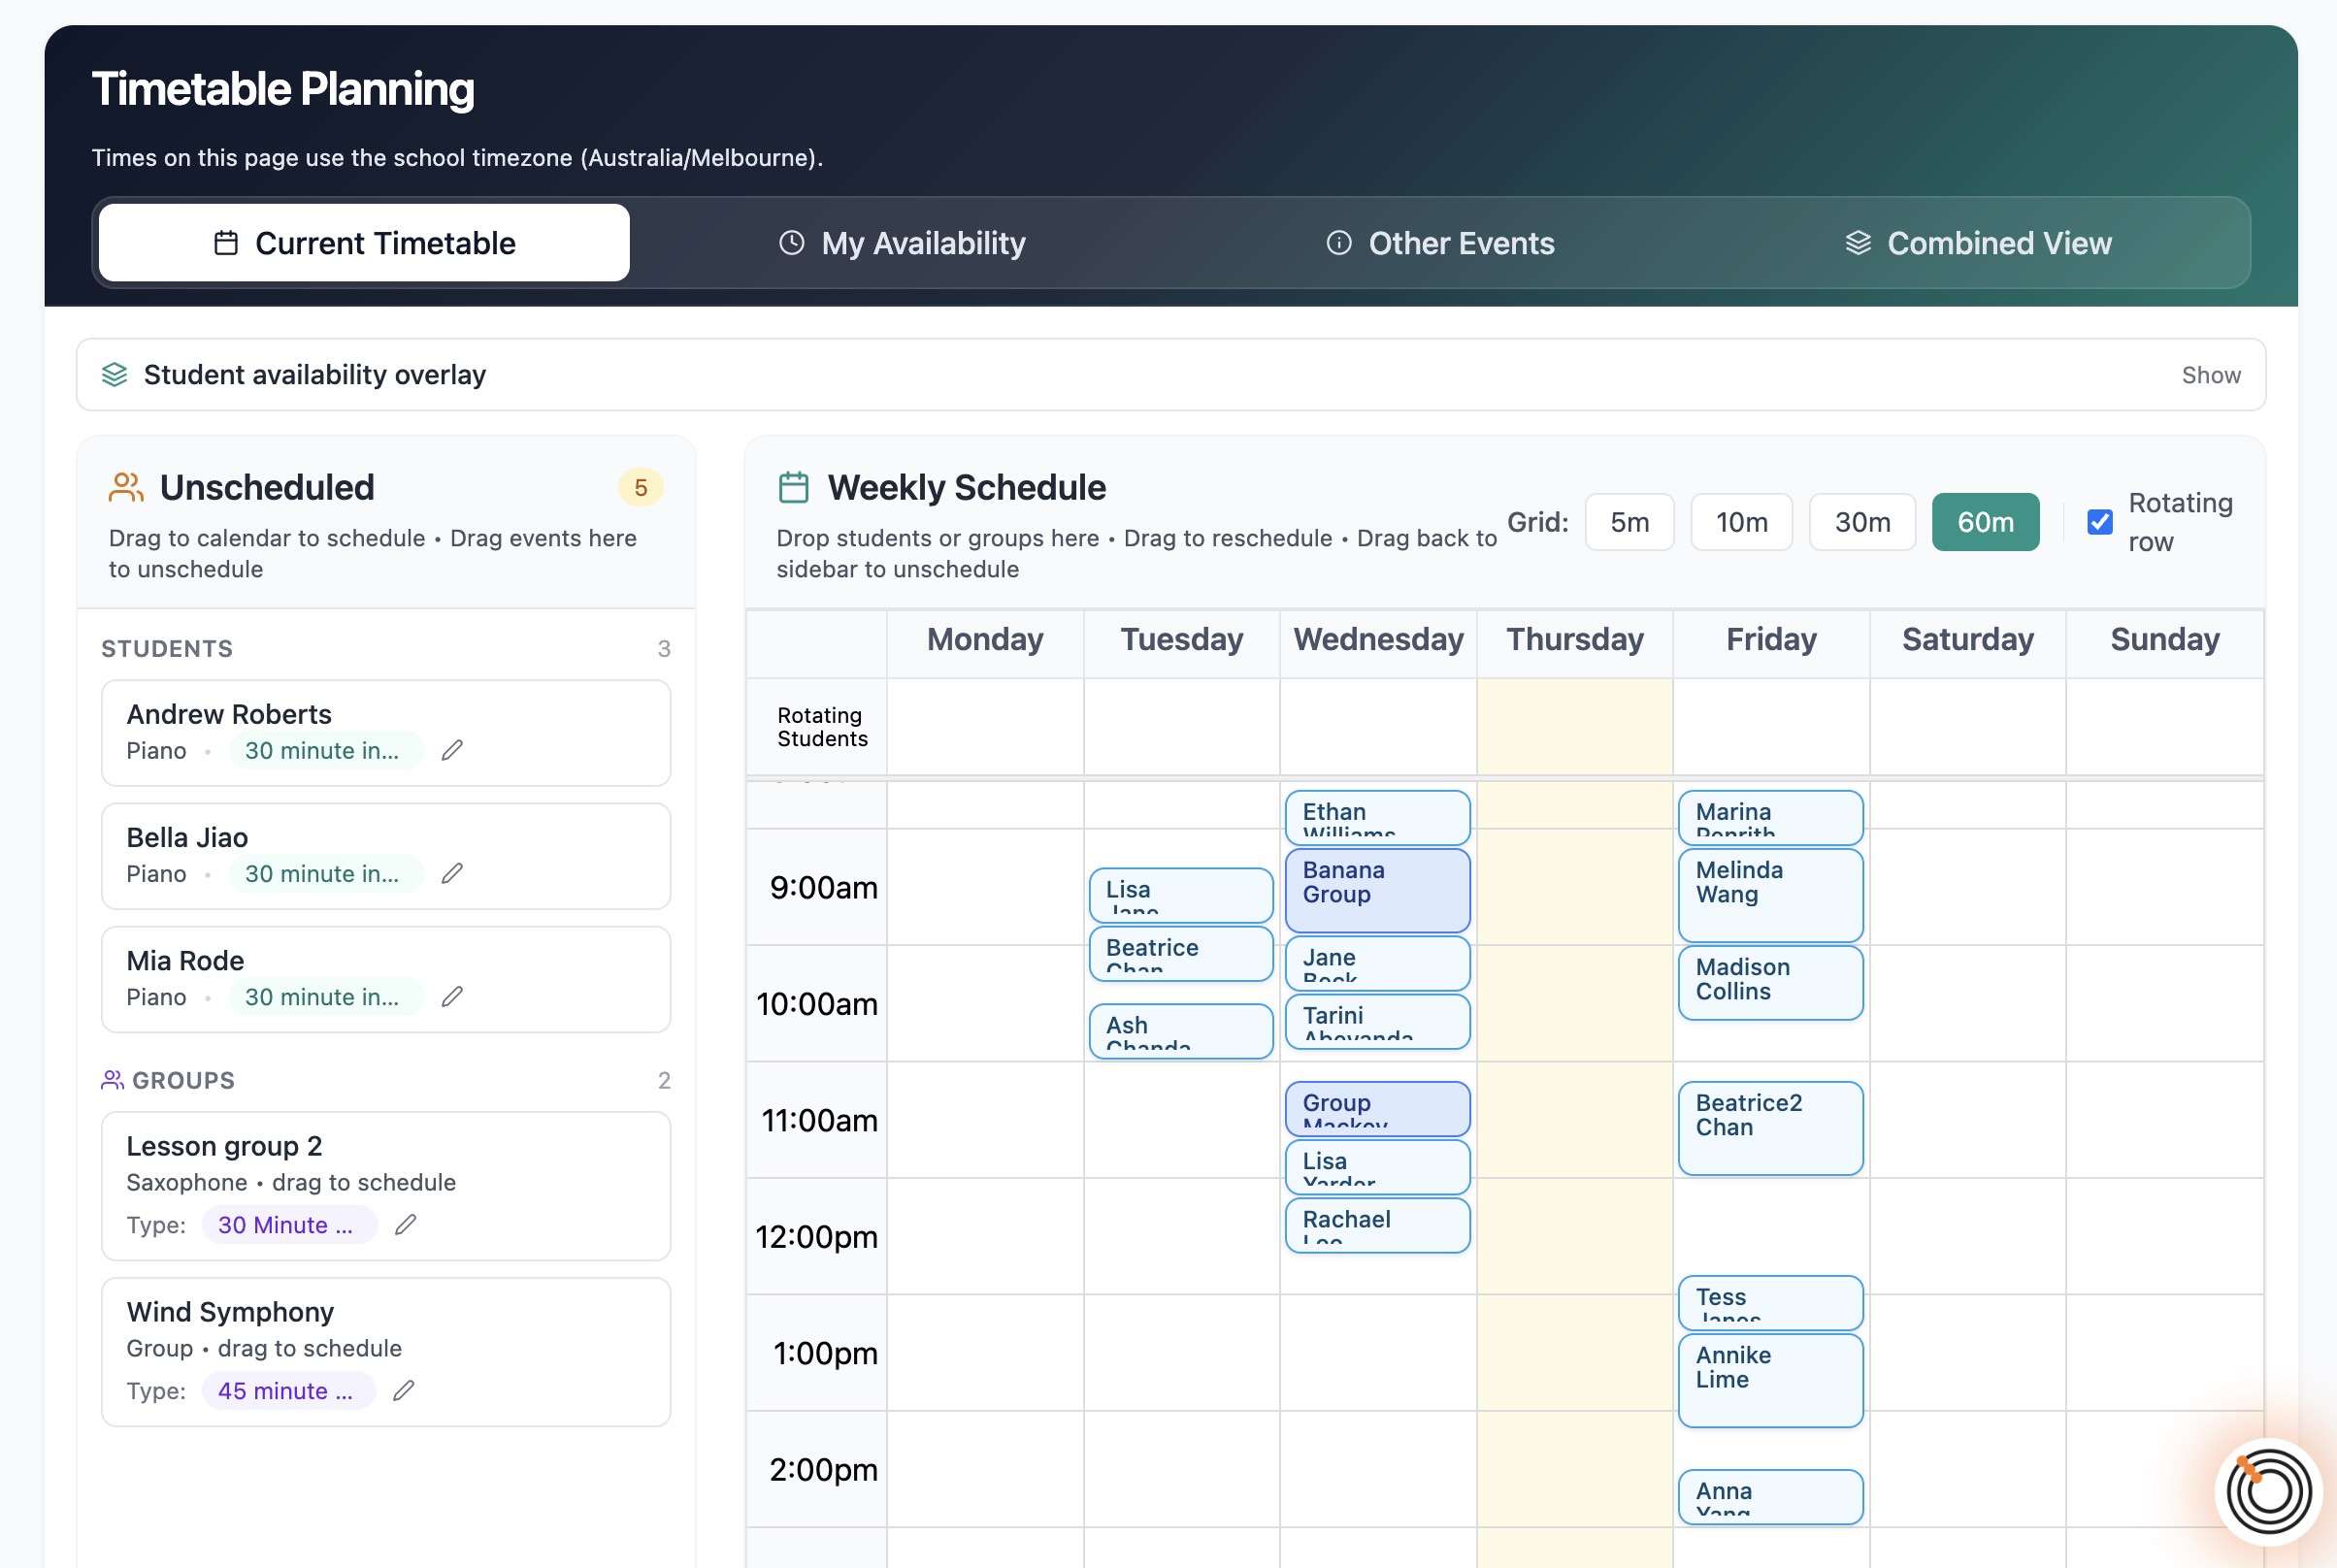
Build the schedule
The main drag-and-drop builder. Place individual students and groups into your weekly grid, configure time slots, and see the whole schedule come together before you generate anything.
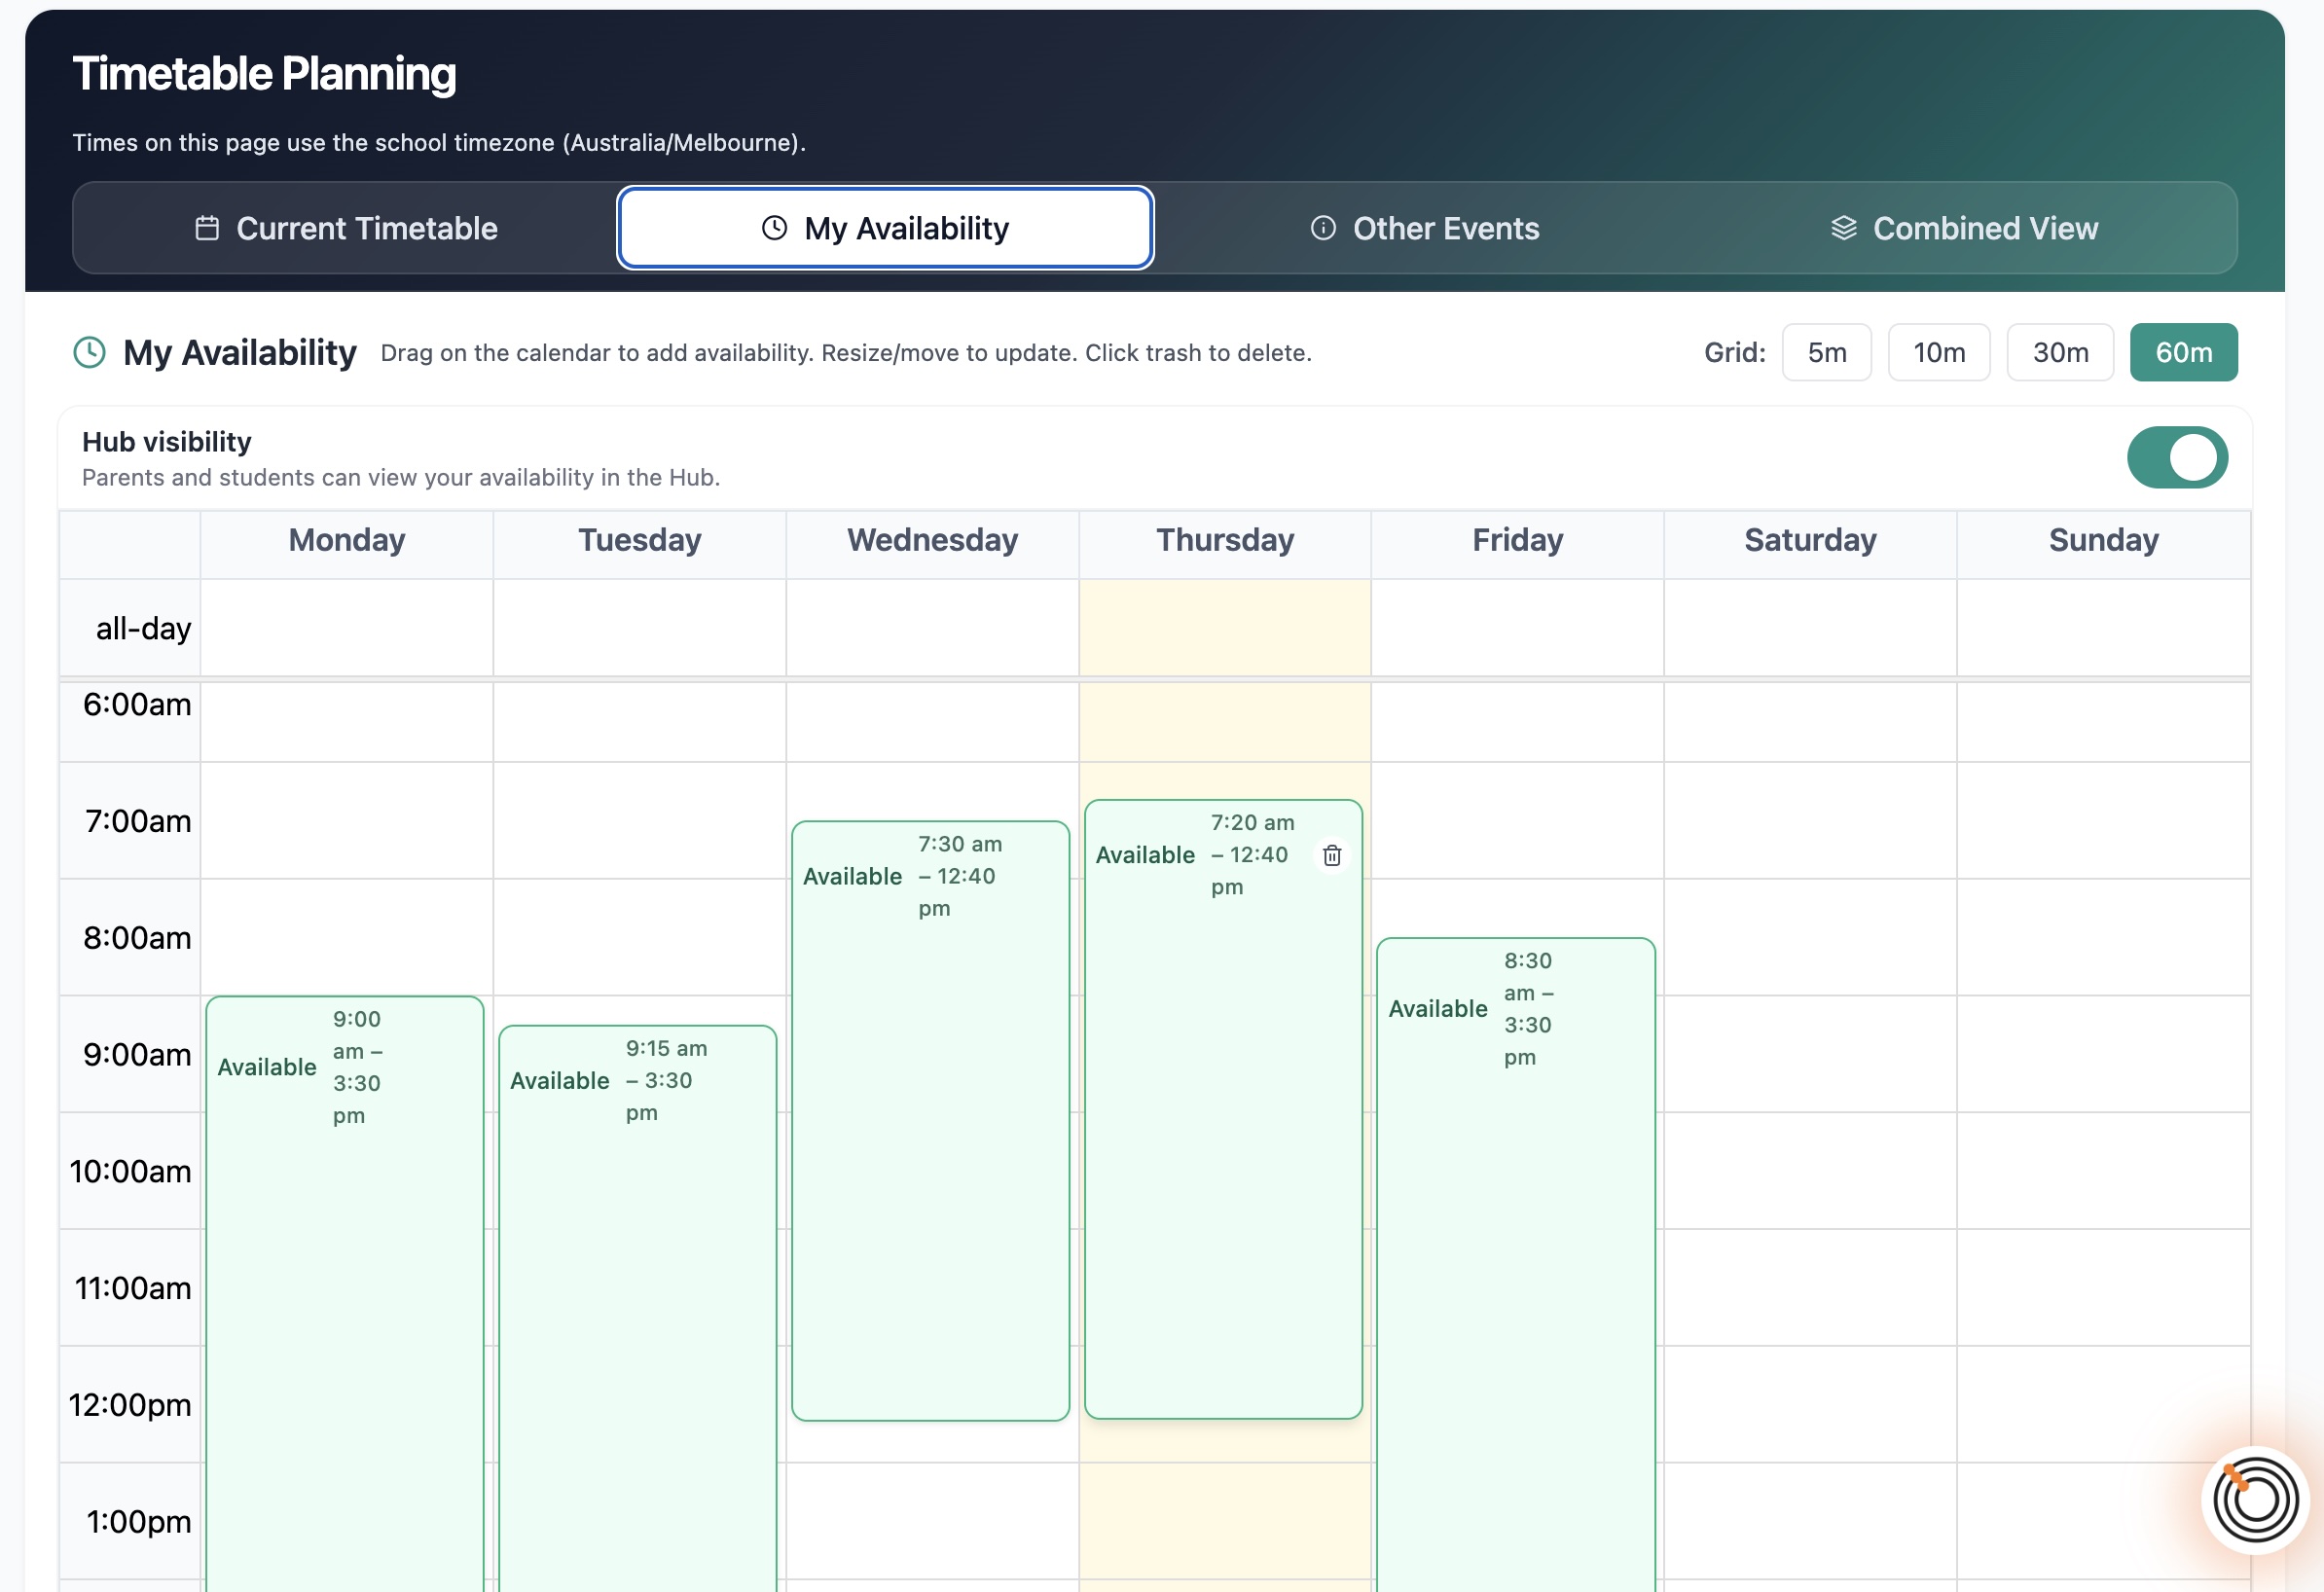
Mark your own hours
Mark your own free hours so the scheduler knows when you're actually available to teach. This feeds directly into the planning logic and the Combined View.
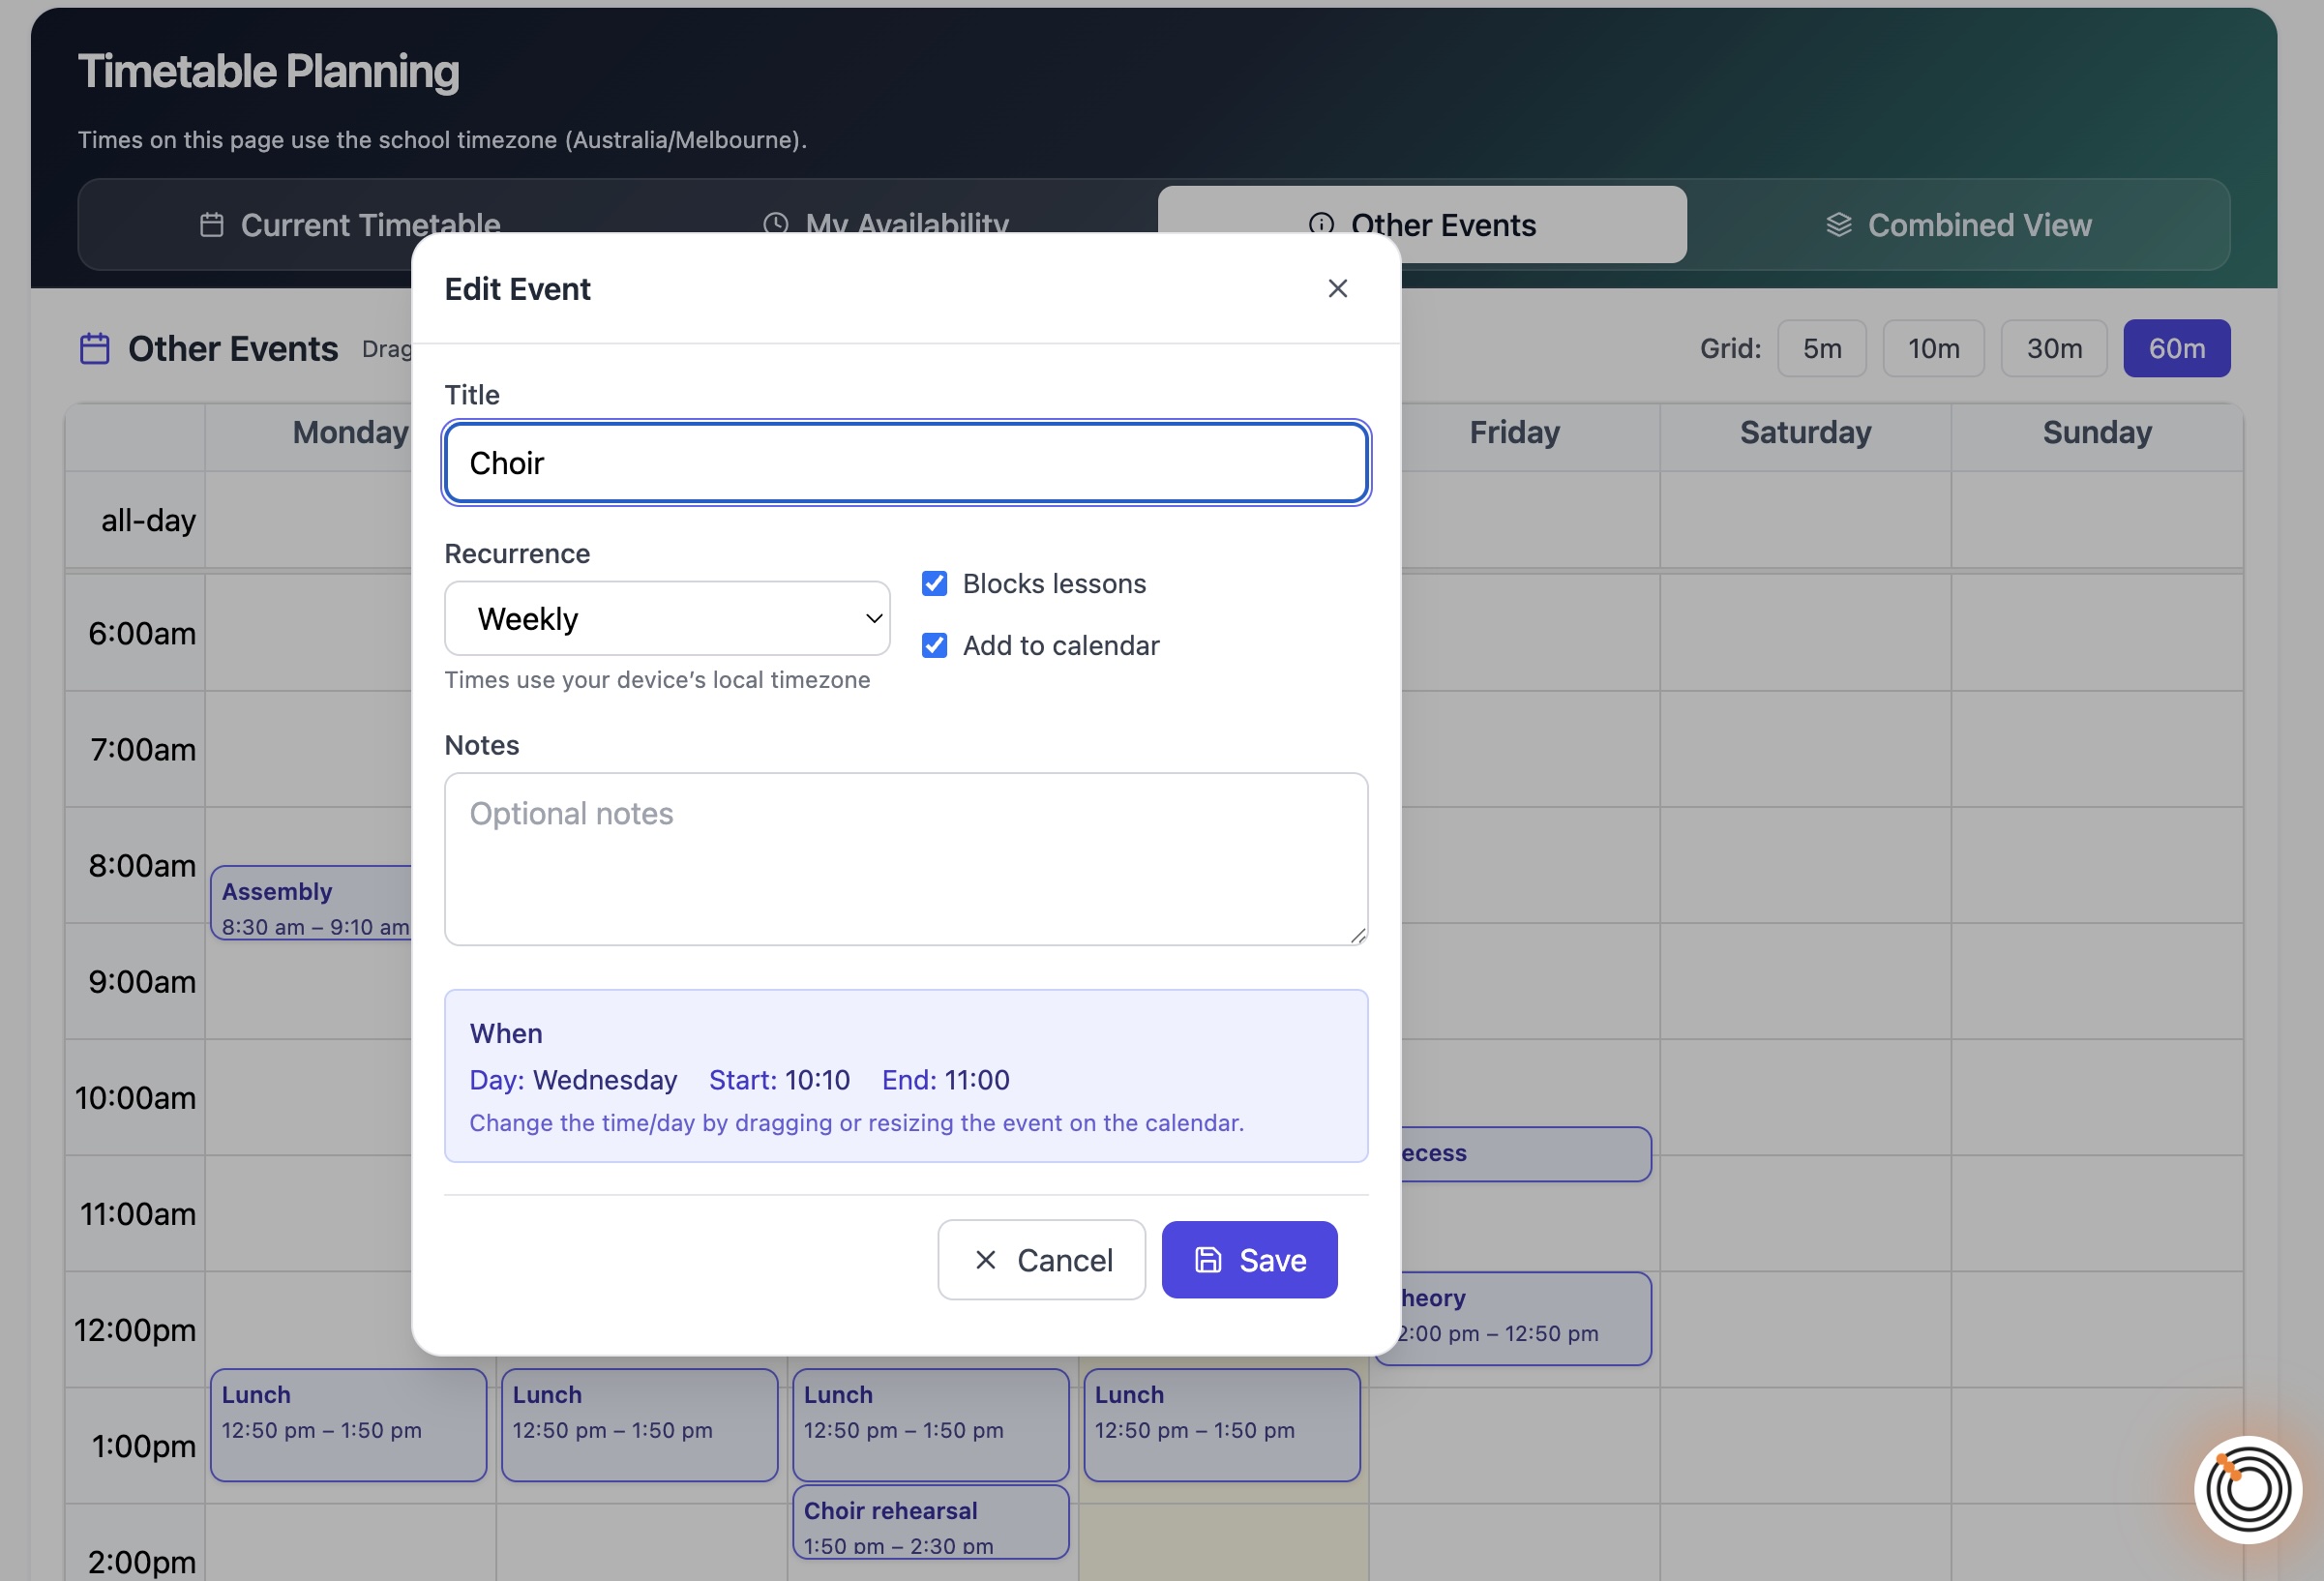
Block out non-lesson time
Add school events, rehearsals, meetings, and anything else that takes up teaching hours. These appear in the grid as unavailable blocks so nothing gets accidentally scheduled over them.
See everything at once
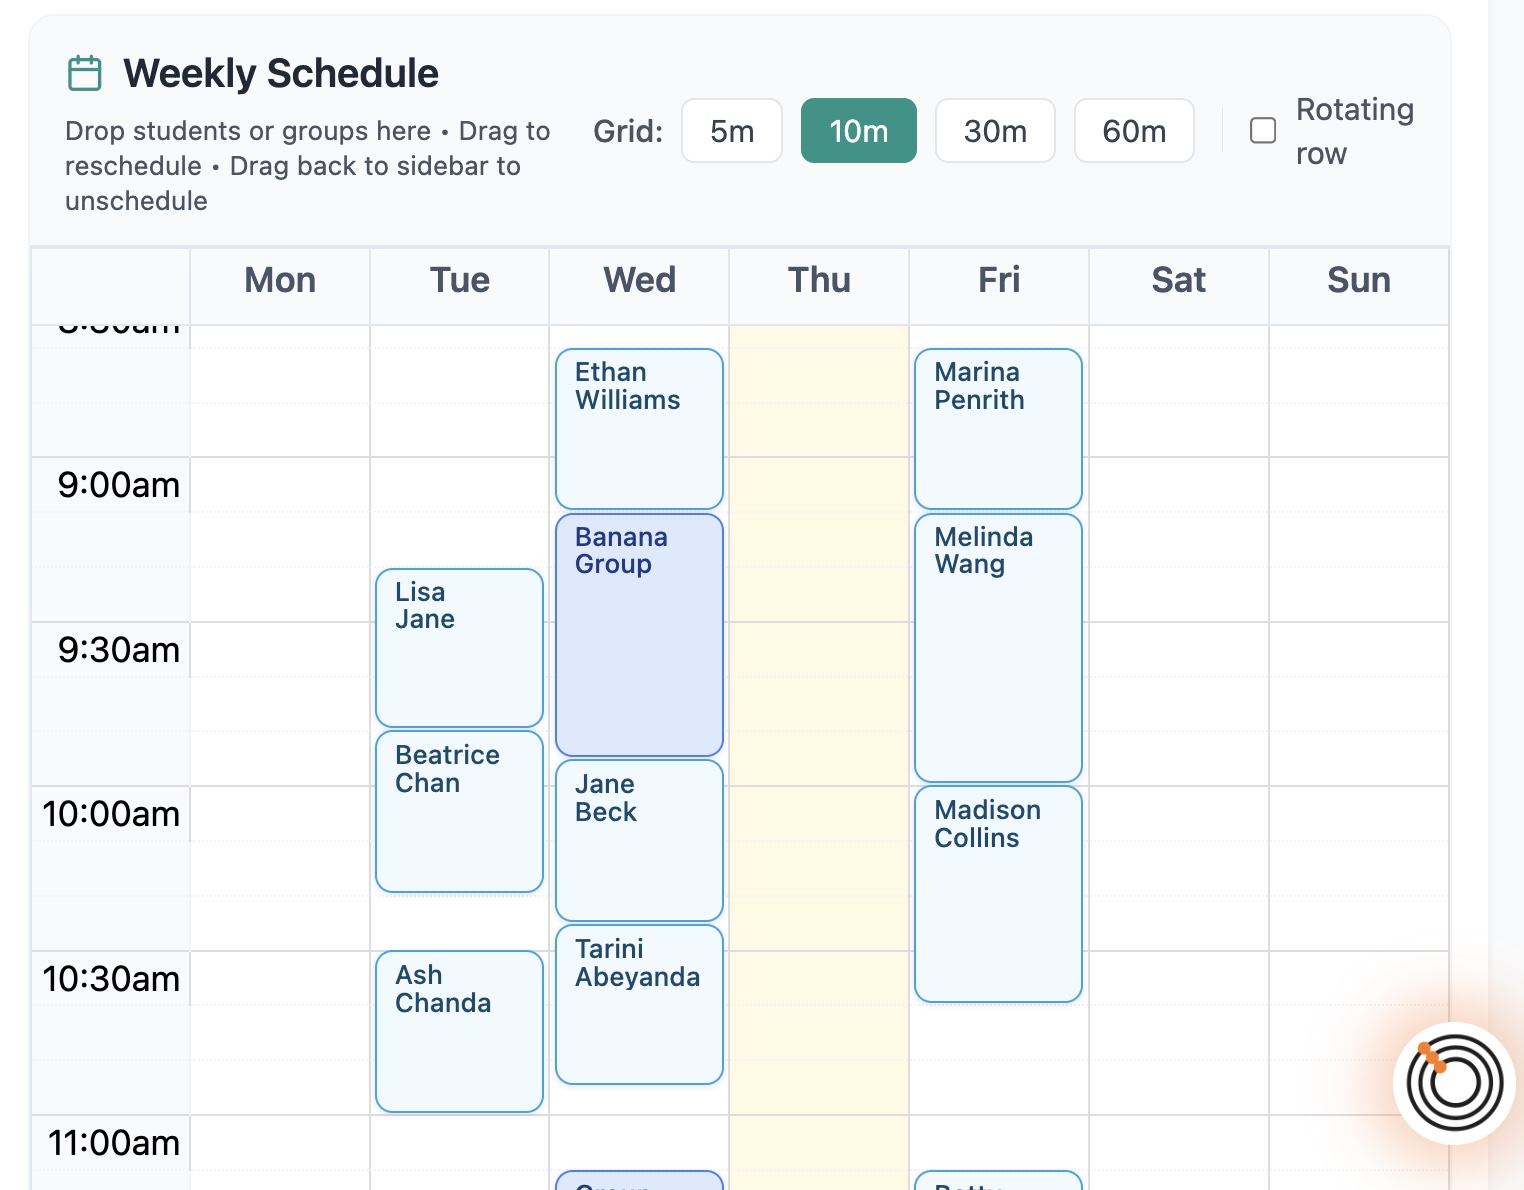
A read-only overlay of everything together: timed students, rotating students, groups, your availability, and other events. Use the filter checkboxes to layer in exactly what you need to see.
See every moving part before you commit
Before you generate a term's worth of lessons, you want to know that the plan actually works. Combined View shows everything at once.
Use the filter checkboxes to layer in exactly what you need to see: timed students, rotating students, groups, your own availability, other events. Turn layers on and off to check for gaps, overlaps, or anything that needs adjusting.
It's the final sanity check that gives you confidence before you press generate — and the kind of transparency that makes managing a full term feel manageable rather than chaotic.
Rotating timetables: what used to take hours now takes minutes
In a school setting, instrumental lessons can't sit at the same time every week. If a student always misses the same academic class, that's a problem — for the student, for the classroom teacher, and eventually for you.
The solution is a rotating timetable: lessons that shift to a different time each week (or fortnight), cycling through your availability so no academic subject is ever missed twice in a row.
In the past, working this out manually for a full cohort — across a 10 or 12-week term, avoiding clashes with fixed lessons, other events, and each other — could take hours of spreadsheet work. Teachers often put it off. Or got it wrong. Or both.
With Octavia, you set a student to Rotating weekly, assign them a day, and Octavia does the rest. It places rotating lessons into the available slots after fixed lessons and other events are locked in — automatically avoiding clashes, respecting your availability, and building the full term schedule in one go.
Fixed
Same day, same time, every week. Simple and predictable.
Rotating weekly
Same day each week, but the time advances — students cycle through every available slot across the term, missing no academic class twice in a row.
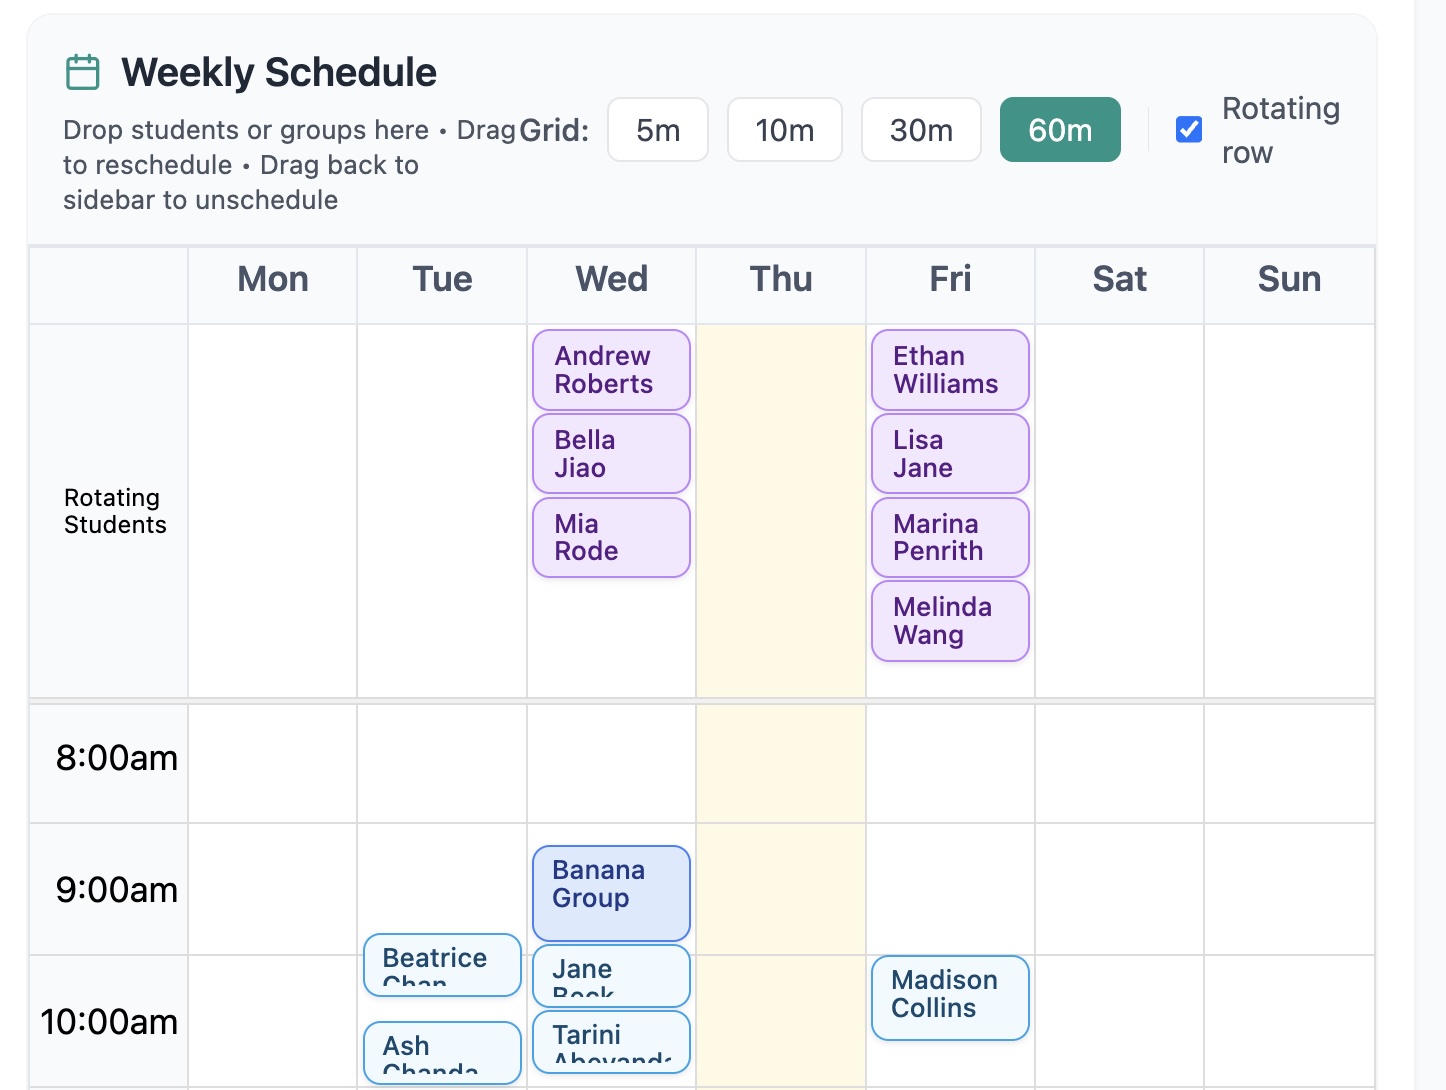
What used to be a multi-hour exercise at the start of every term is now done in minutes.
Generating lessons: transparent, confirmed, and done
Once your timetable is planned and your lesson types are configured, scheduling a student's lessons is a single, clear process — with no hidden steps and no surprises.
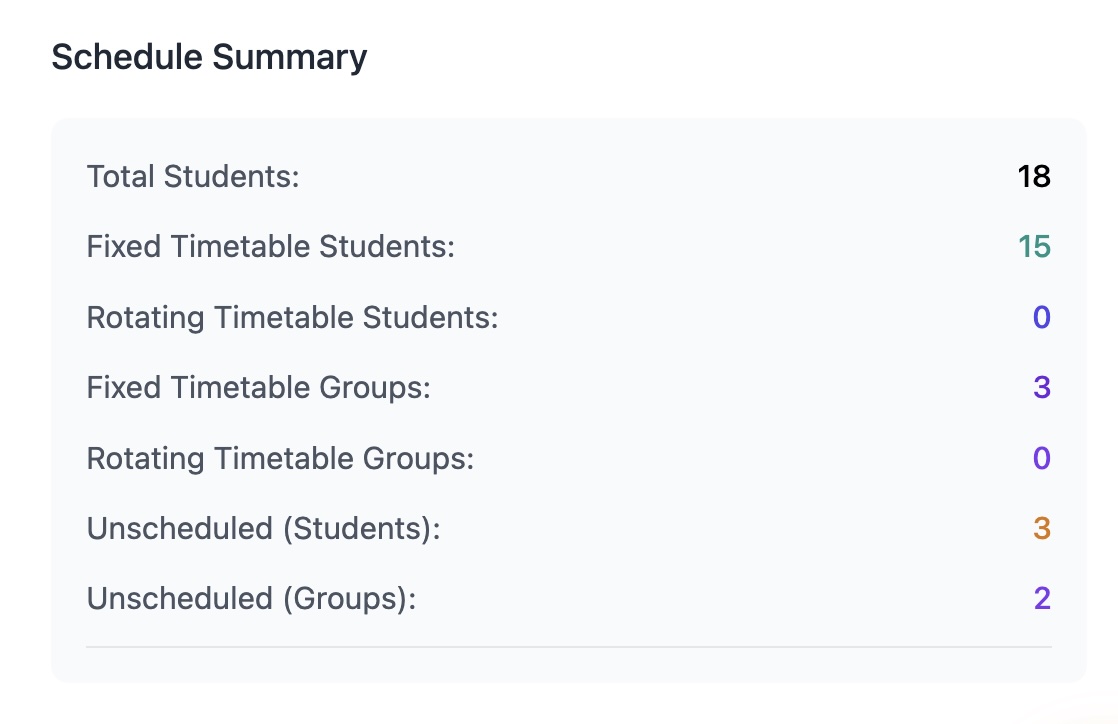
A live Schedule Summary builds as you fill it in
As you configure lesson details — student name, timetable type, lesson type, day, time, duration, and location — the Schedule Summary updates in real time. You see the full picture before you confirm a thing.
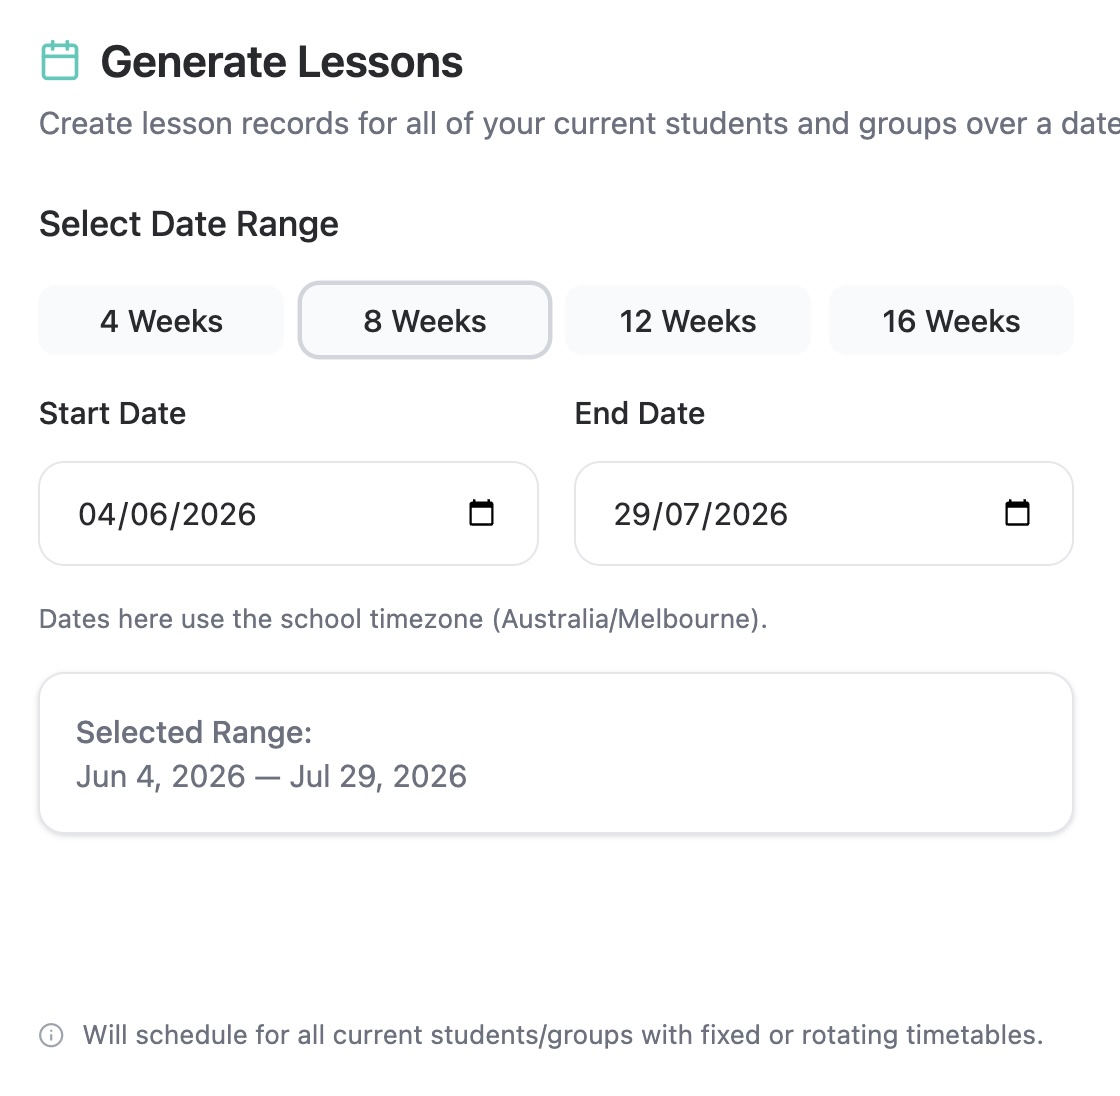
Choose how many weeks to schedule
Pick a term length: 4, 8, 12, or 16 weeks. Then click Schedule Lessons to see a full breakdown of what's about to be created — before anything is committed.
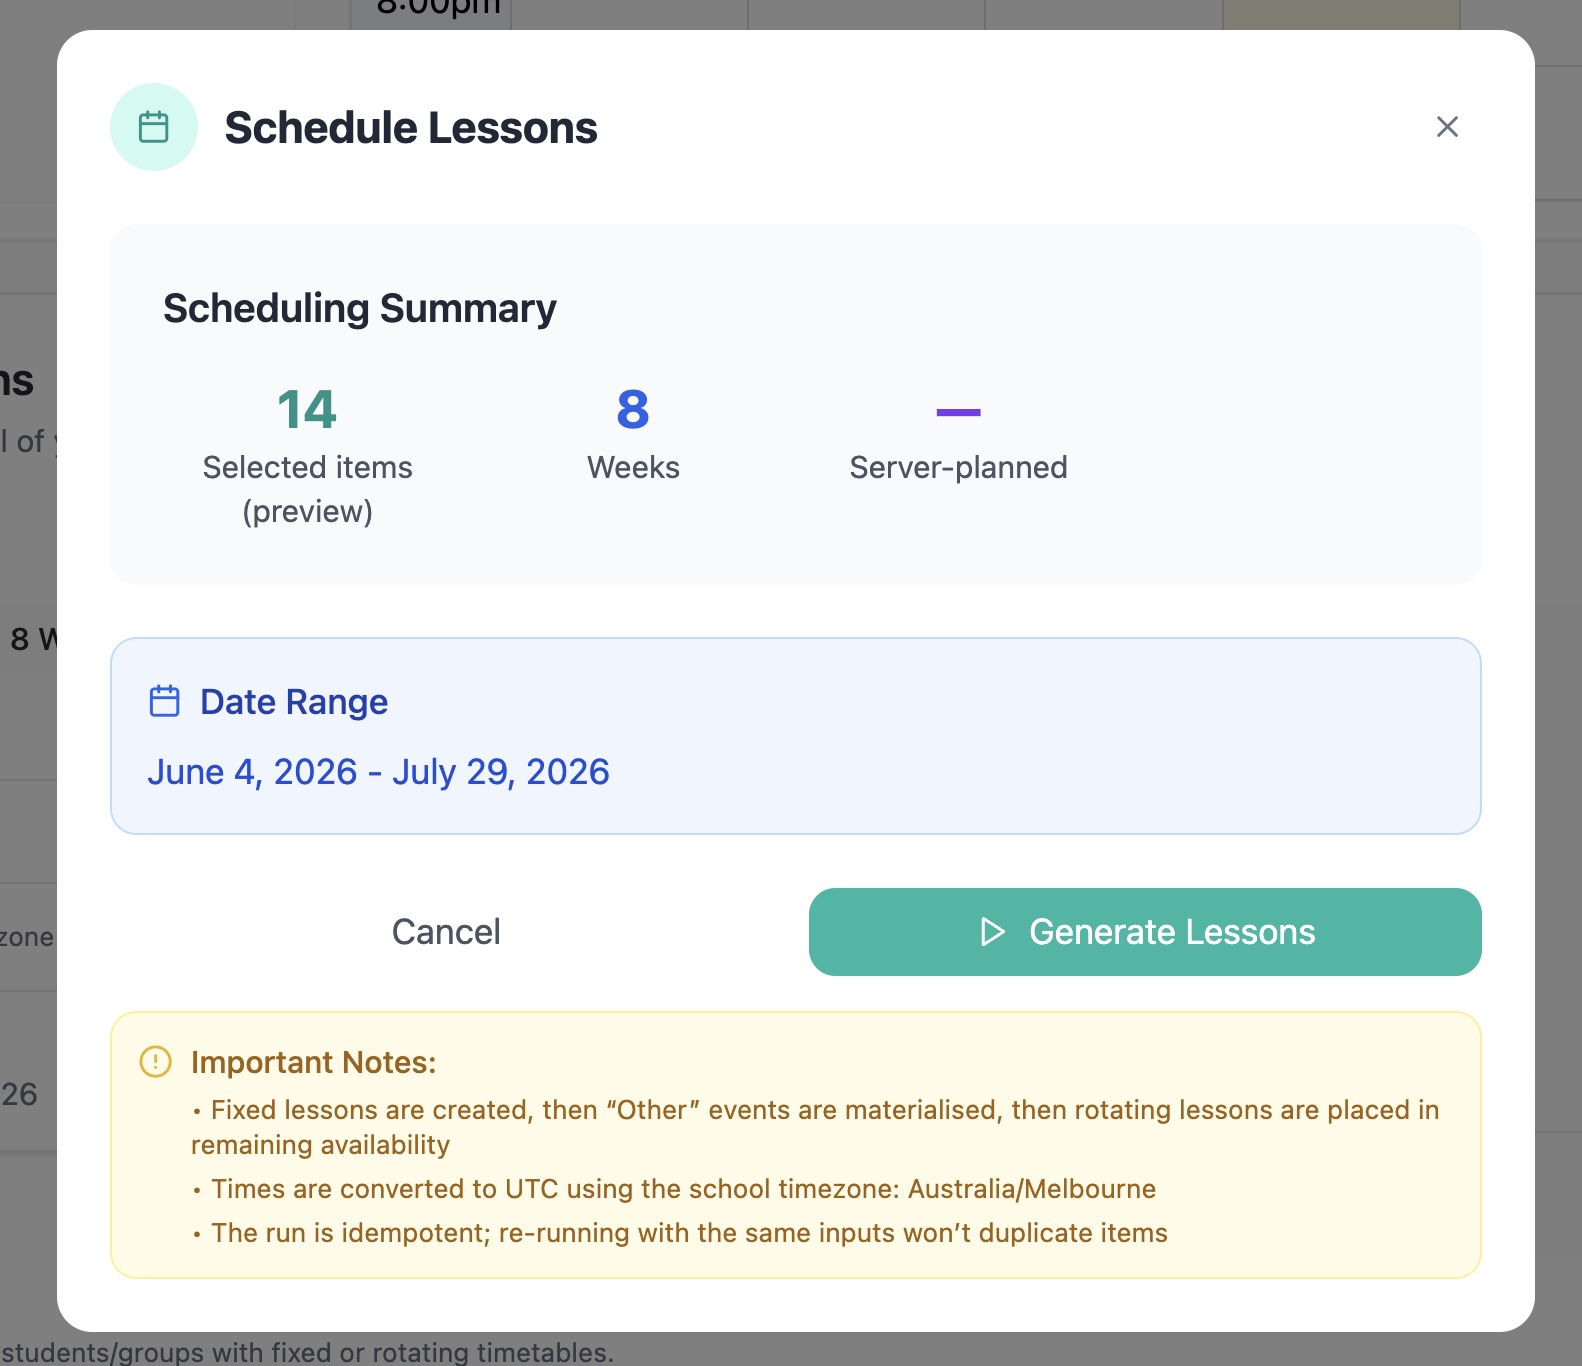
A confirmation modal breaks it all down
Before generating, a confirmation modal shows a full breakdown: how many fixed lessons, how many rotating lessons, and how many other events will be created. Nothing happens until you confirm.
This is exactly the kind of transparency that teachers managing term schedules need.
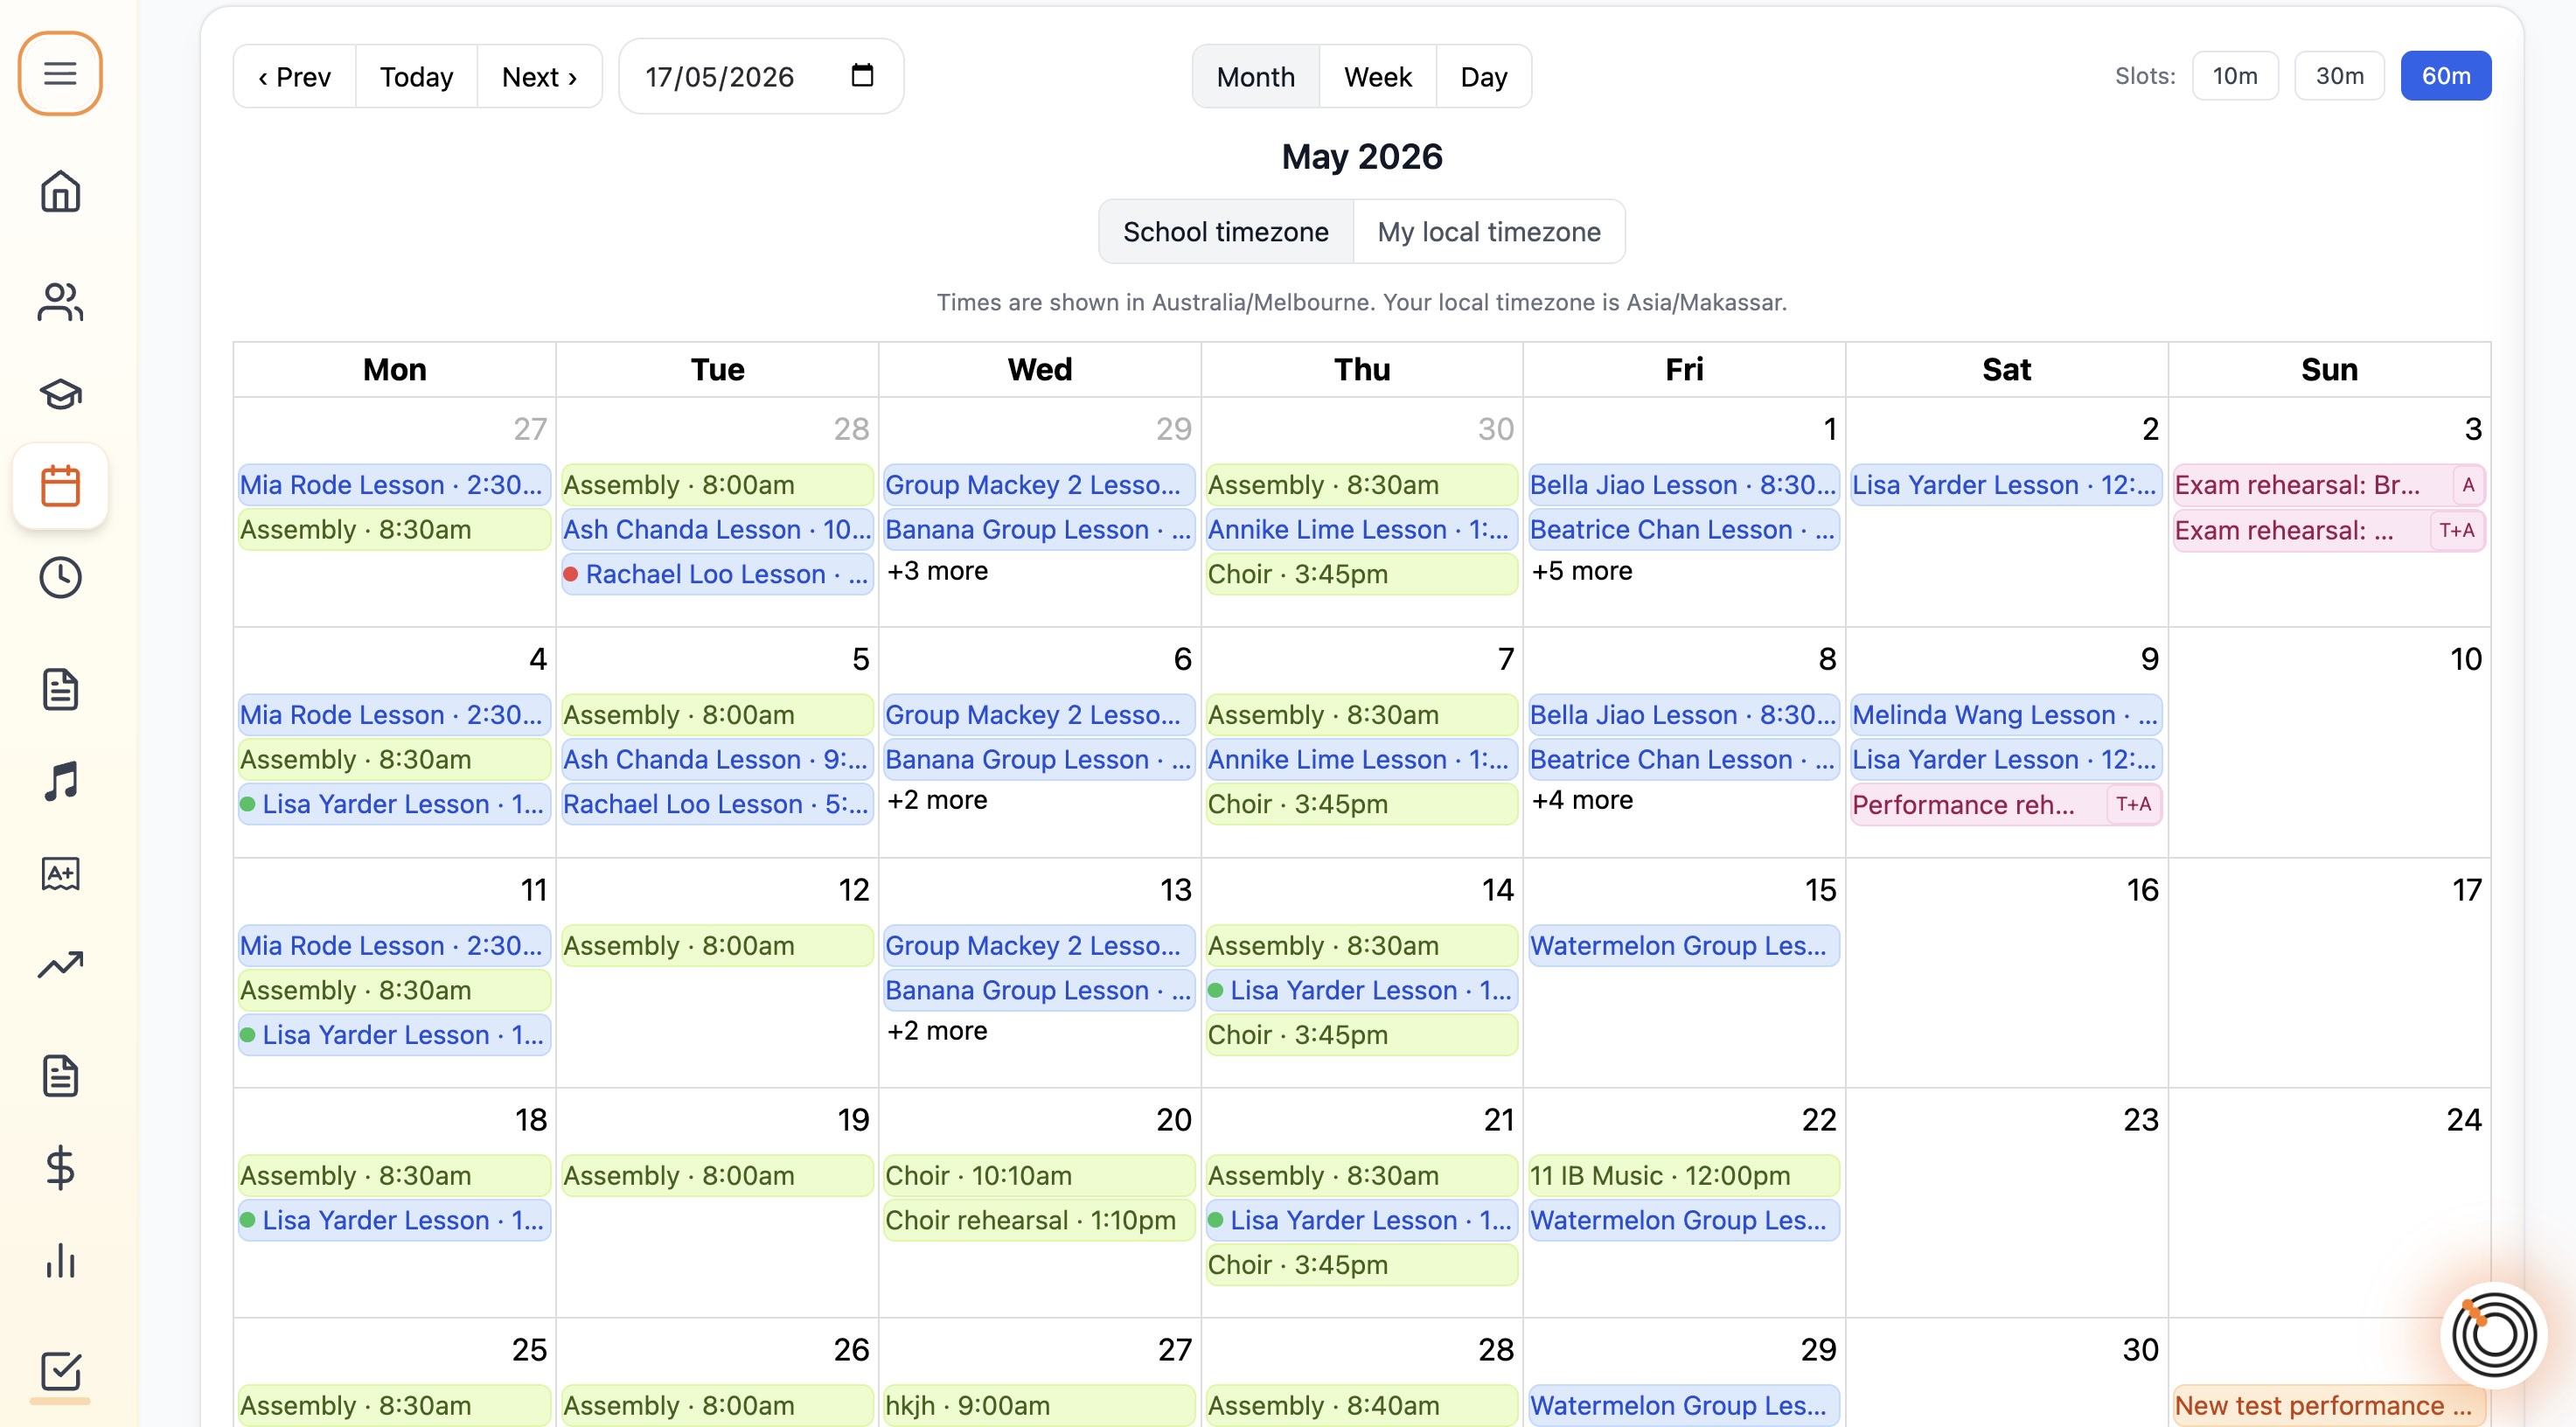
...and your term is done
Octavia generates the lessons, and just like that, your term is scheduled. The calendar is populated. Students can see their lesson times. You're done.
Guided from day one
When you first visit the Scheduler, Octavia surfaces a short contextual video — right there in the interface — that explains what you're looking at and how to get started.
You don't need to read a help article or watch a tutorial separately. The guidance appears exactly where you need it, when you need it. One click to dismiss, and the feature is yours to explore.
Plan your teaching week the visual way
Set up your timetable, place your students, and generate a full term of lessons — in minutes.